Getting Started with Demyst
The Demyst Platform simplifies and accelerates deployment of external data solutions for the world's leading banks, insurers and fintechs, typically deploying 10 times the data, 10 times faster. It is a single global interface that eliminates the friction of external data discovery, solution build and deployment, driving innovation and business growth. Unlock the power of external data via a single platform, with access to hundreds of data providers worldwide, customize pre-built template solutions and deploy multiple data sources together in seconds to solve business use cases with external data.
This guide takes a new Demyst user from signup through their first production deployment of external data. By following it, you will deploy via Demyst Data API, which are HTTPS APIs built easily using Demyst's proprietary language that allows you to apply your own custom logic on top of multiple data sources, all deployed as a single API. Once deployed, Data APIs are typically used to power your core applications with external data such as being used in a production customer workflow or being pulled directly into a CRM.
(For specific information about other data deployments, please contact our sales team.)
This guide covers 8 steps for creating a production Data API:
-
Accessing the platform and sign up
-
Finding relevant data in the Data Catalog
-
Finding relevant recipes in the Data Catalog
-
Creating and testing Data APIs
-
Editing the configuration of a Data API
-
Running a programmatic request against a Data API
-
Moving a Data API from evaluation to production
-
Viewing reporting dashboards
Step 1: Accessing the platform and Sign up
The Demyst Platform is accessible from our website:
-
You can access the Demyst platform by visiting our website and browse through the Data Catalog right away without the need of signing up
-
Log in to the Demyst platform with your new credentials on the log in page.
-
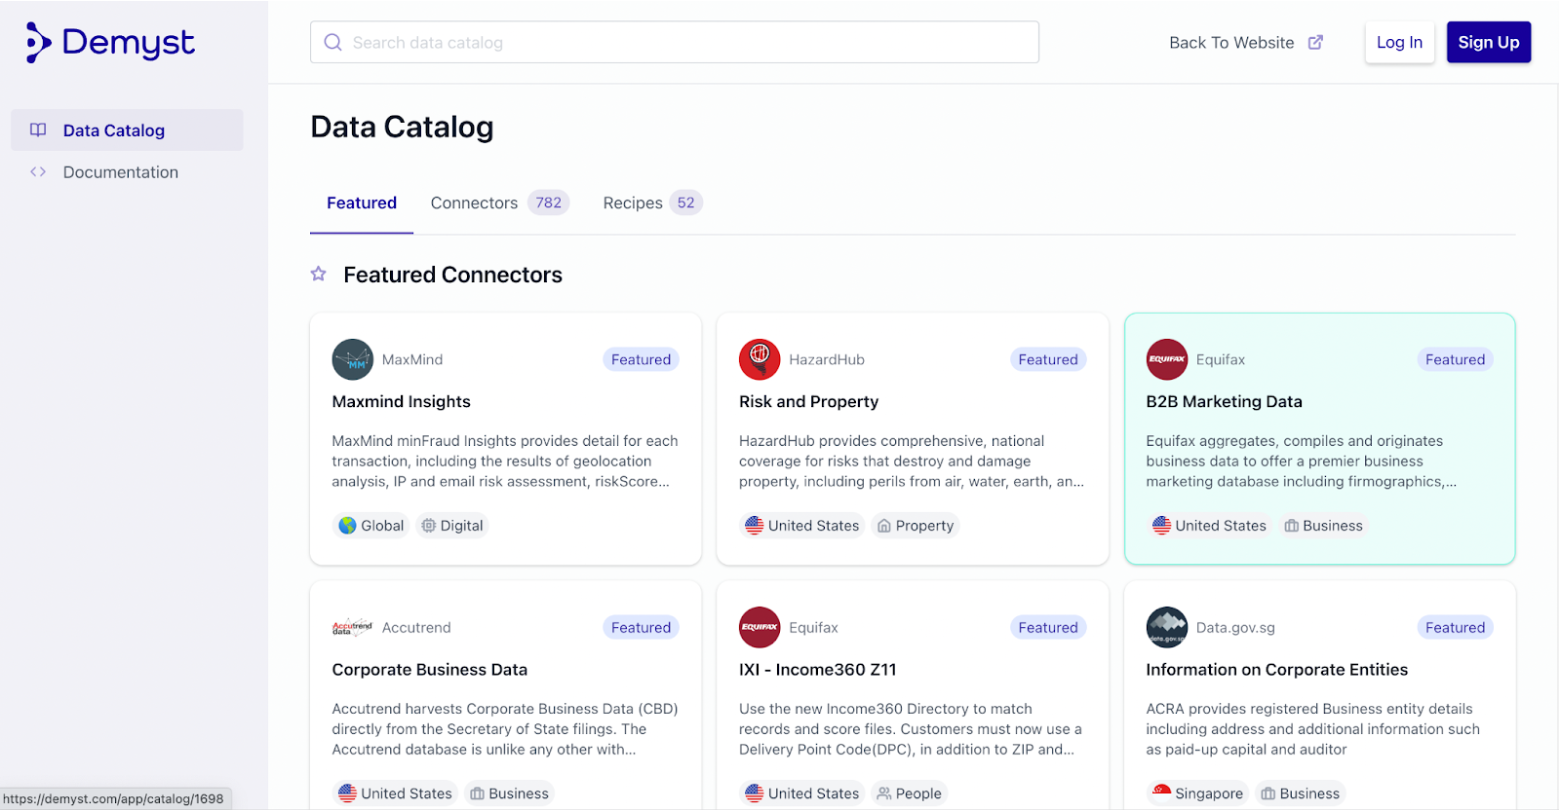
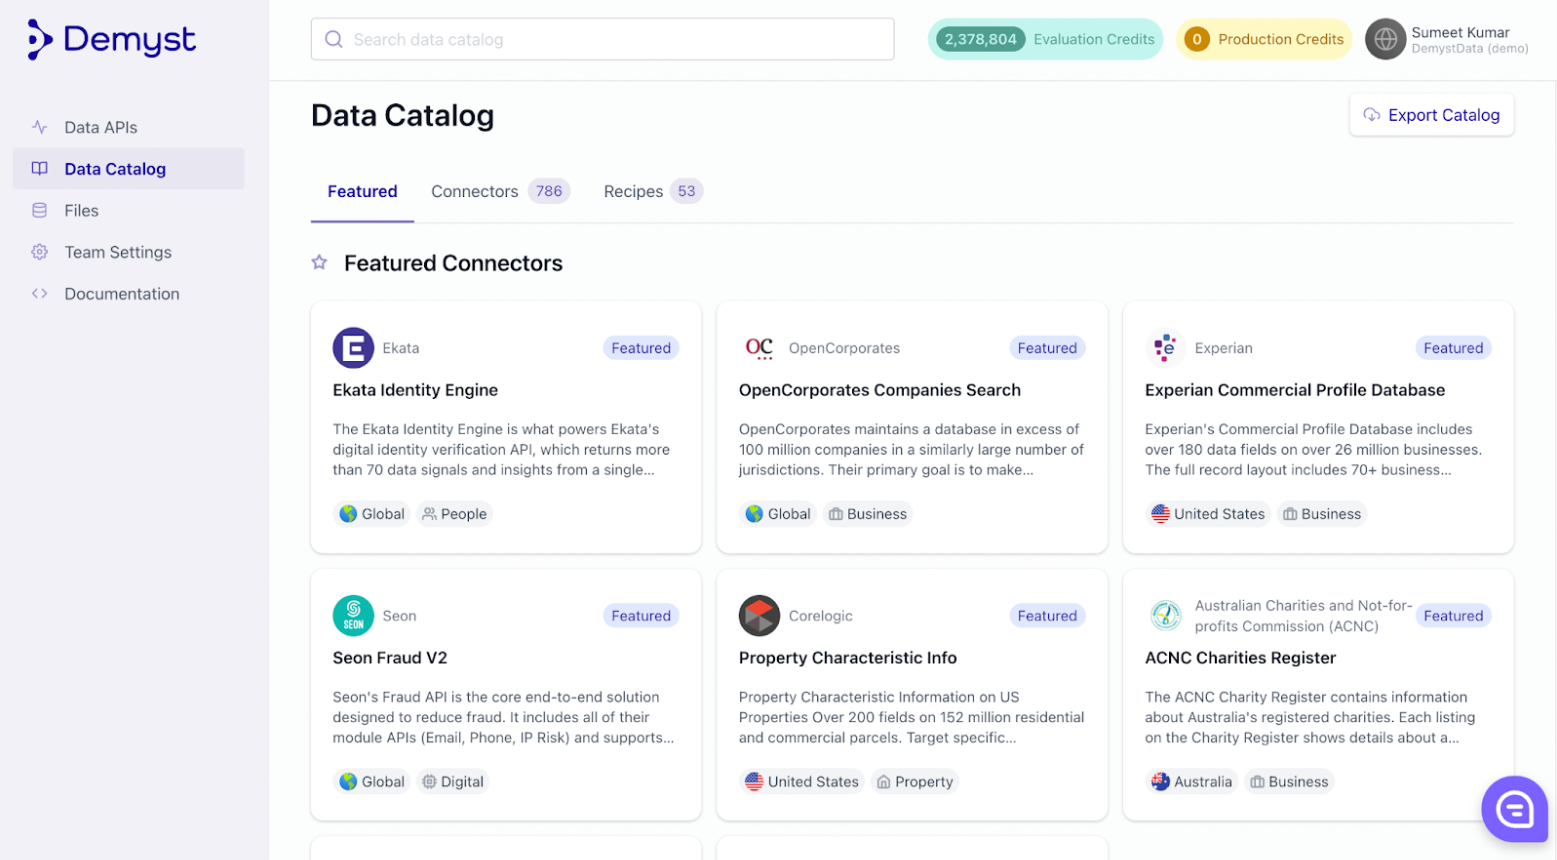
The Data Catalog home page consists of:
-
Featured Data connectors: The most commonly used or recently integrated data connectors that are ready-to-deploy on the platform.
-
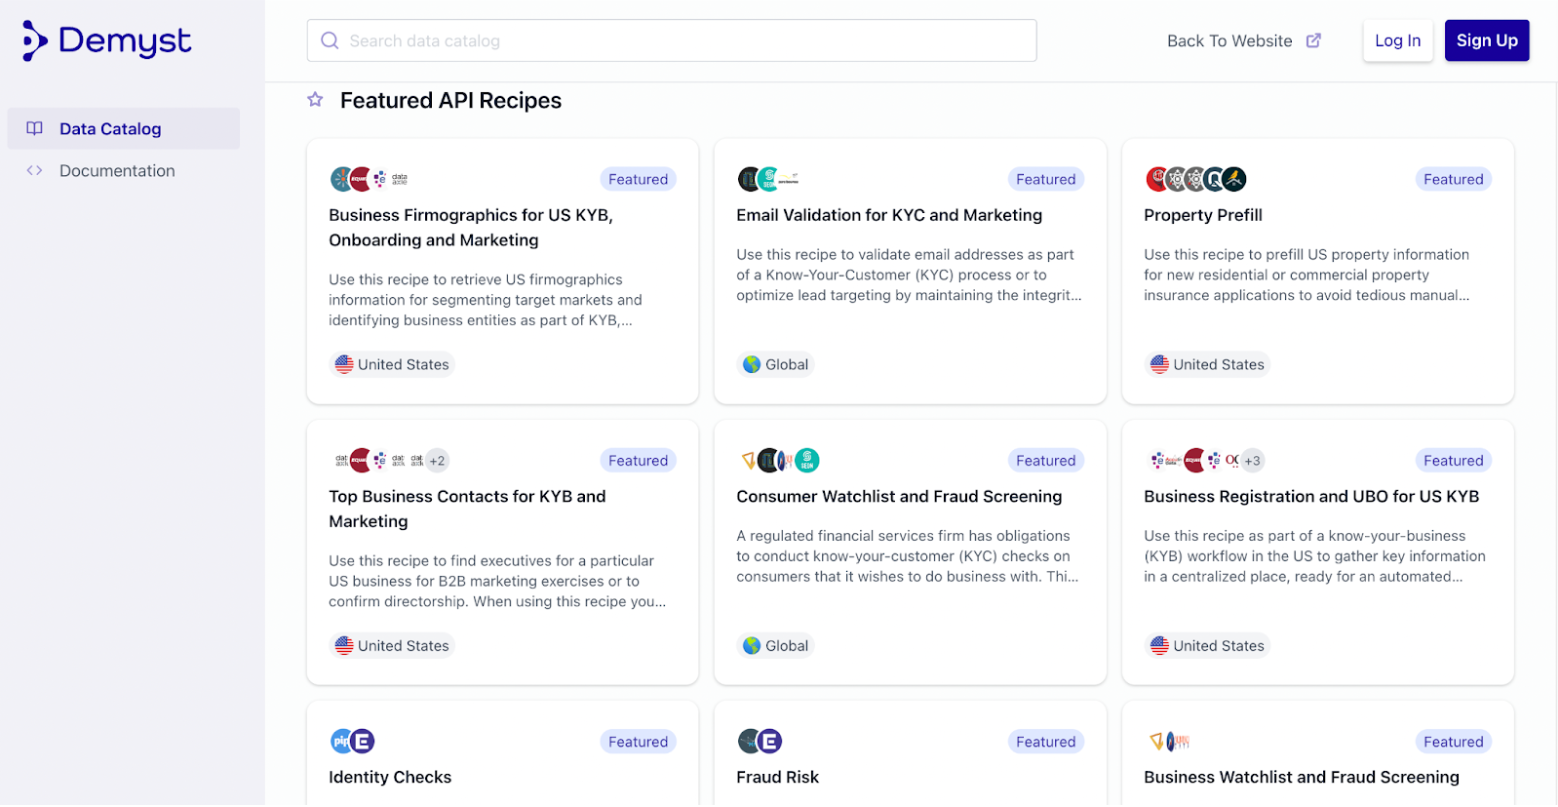
Featured Data Recipes: The most commonly used or recently integrated Recipes. Recipes are template Data API configurations pre-built by Demyst for getting started on common business problems.
-
-
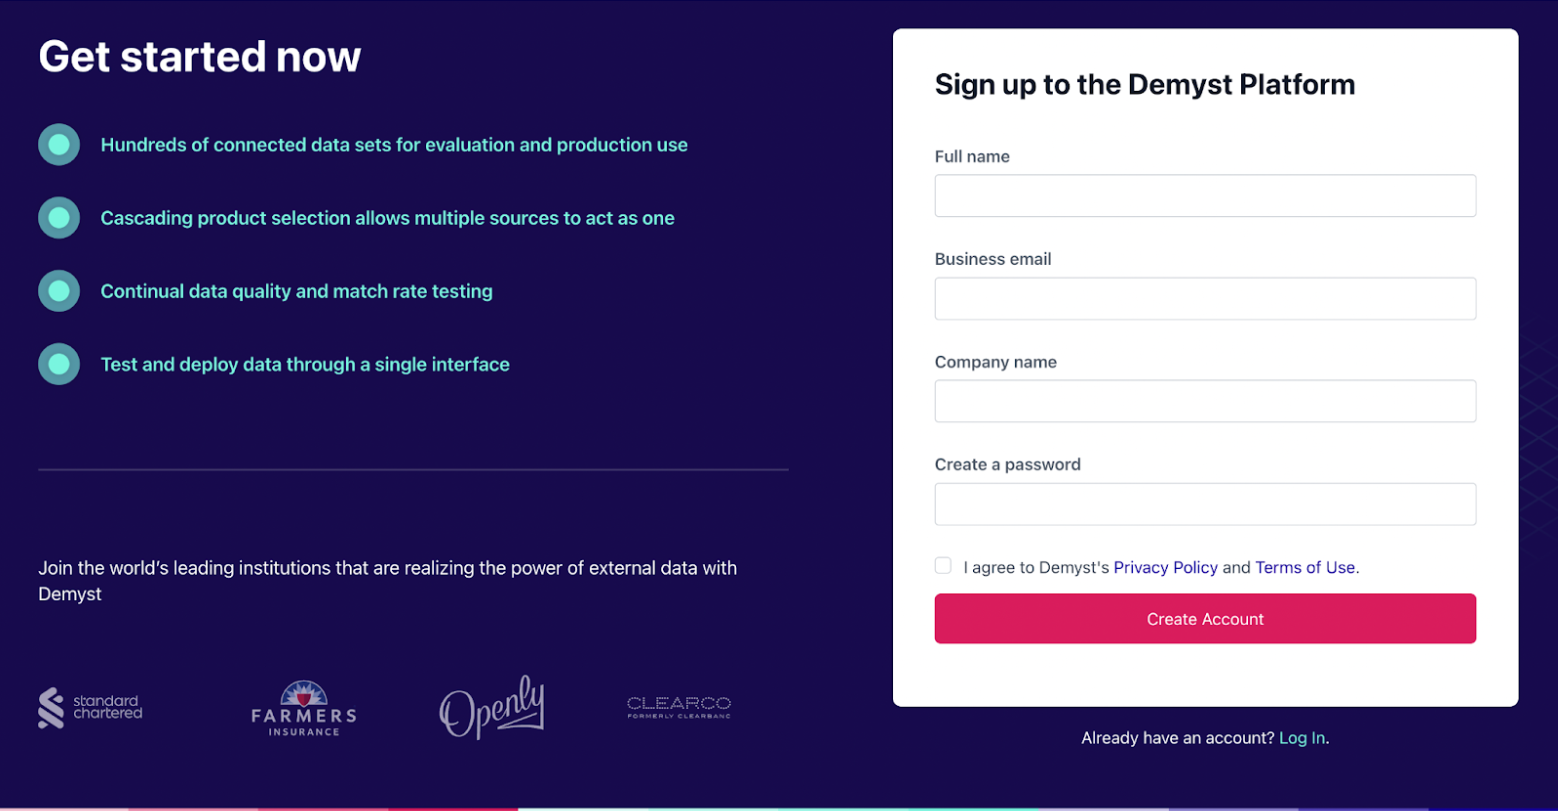
To access the full functionality of the platform for the rest of this guide, you will need to sign up
-
Create an account for the Demyst platform by clicking the sign up button in the top right corner of the Data Catalog page, going directly to our sign up page & filling in the details requested on screen, or following the instructions in your signup email if you were invited to the platform by a colleague.
-
Log in to the Demyst platform with your new credentials on the login page.
-
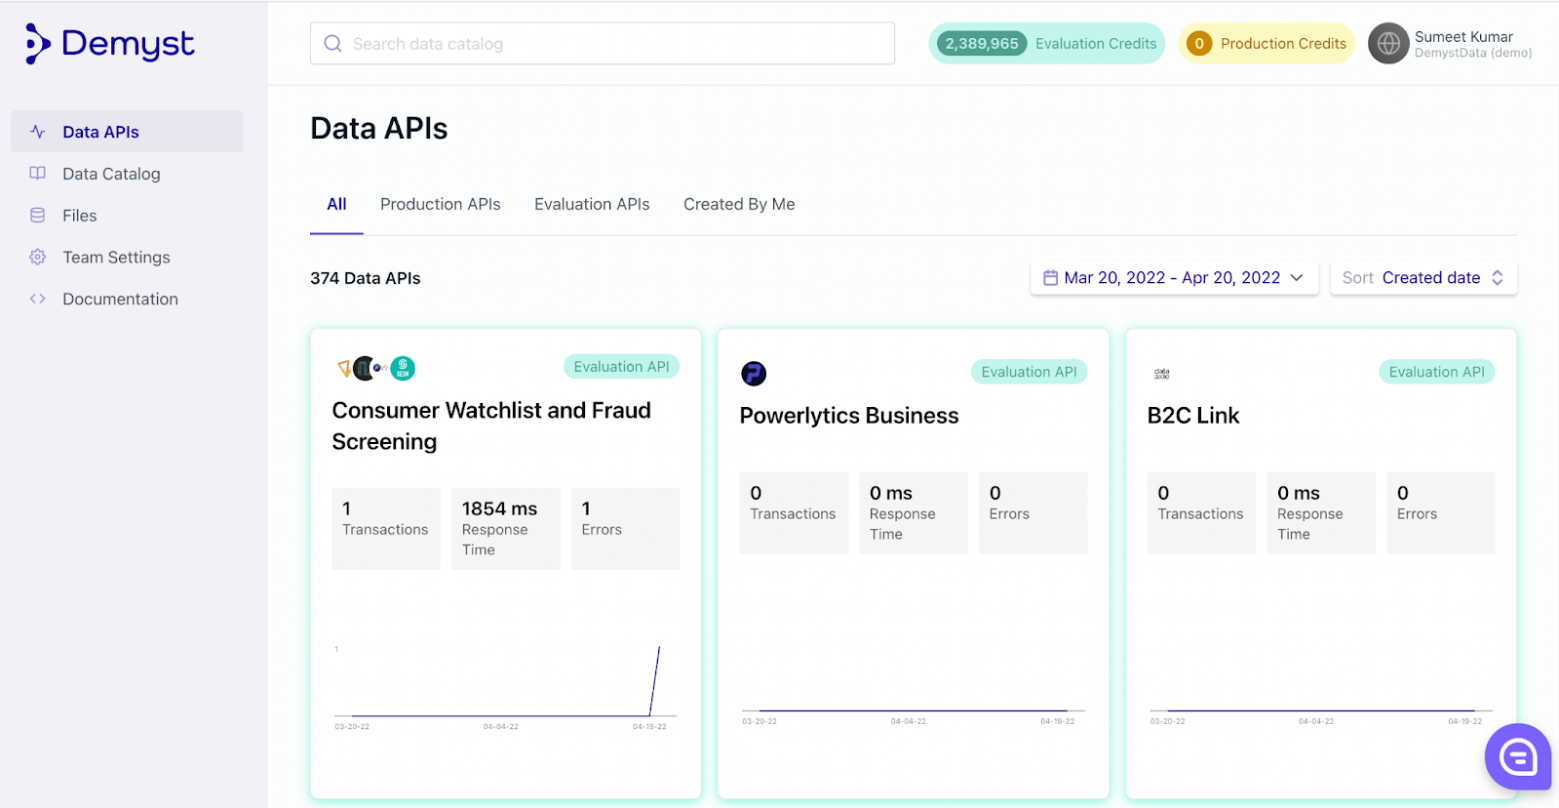
Once logged in, you can find on the left-side navigation menu:
-
Data APIs: To see all your organization's built Data APIs.
-
Data Catalog: To access the Demyst Data Catalog.
-
Files: For transferring files to Demyst.
-
Team Settings: For changing settings for your organization, or inviting new users.
-
Documentation: To view our entire suite of documentation.
-
-
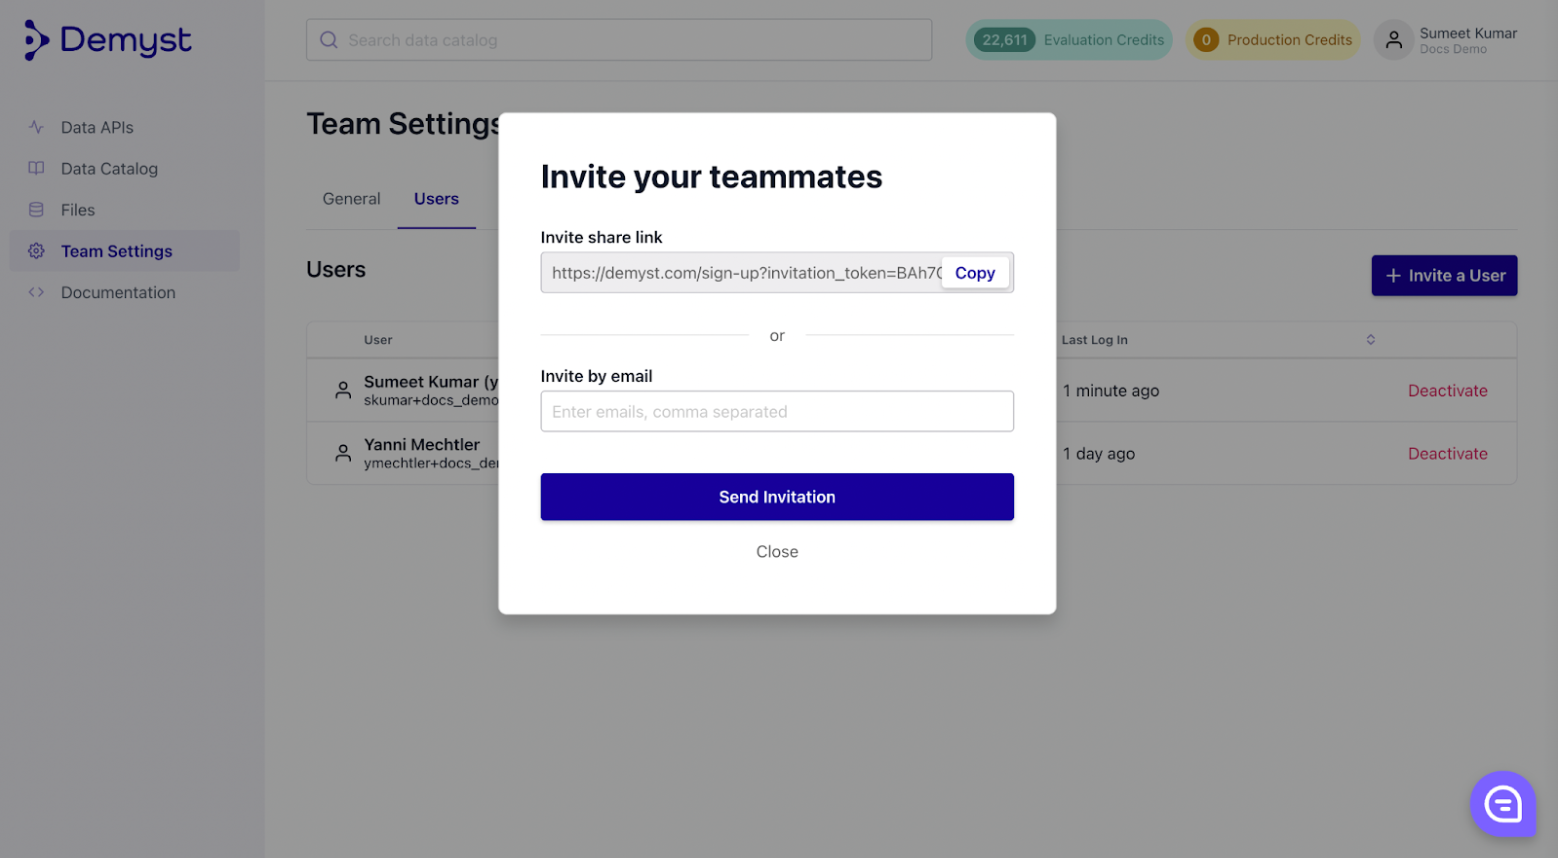
Lastly, you can also invite your colleagues to the platform by clicking on team settings, navigating to the user tab, clicking invite a user and entering their email address.
This concludes accessing the platform, signing up and orienting yourself with the main pages.
Step 2: Finding a relevant product in the Data Catalog
Tiles in the data catalog show descriptions, country coverage, pricing, data dictionaries, and other details for the hundreds of datasets that can be deployed through Demyst. Listings also include metadata such as tags for data categories or relevance to common use cases to support easier browsing.
-
Once logged in, navigate to the Data Catalog clicking the "Data Catalog" button on the left.
-
You can view Featured Connectors and Recipes in the Data Catalog.
-
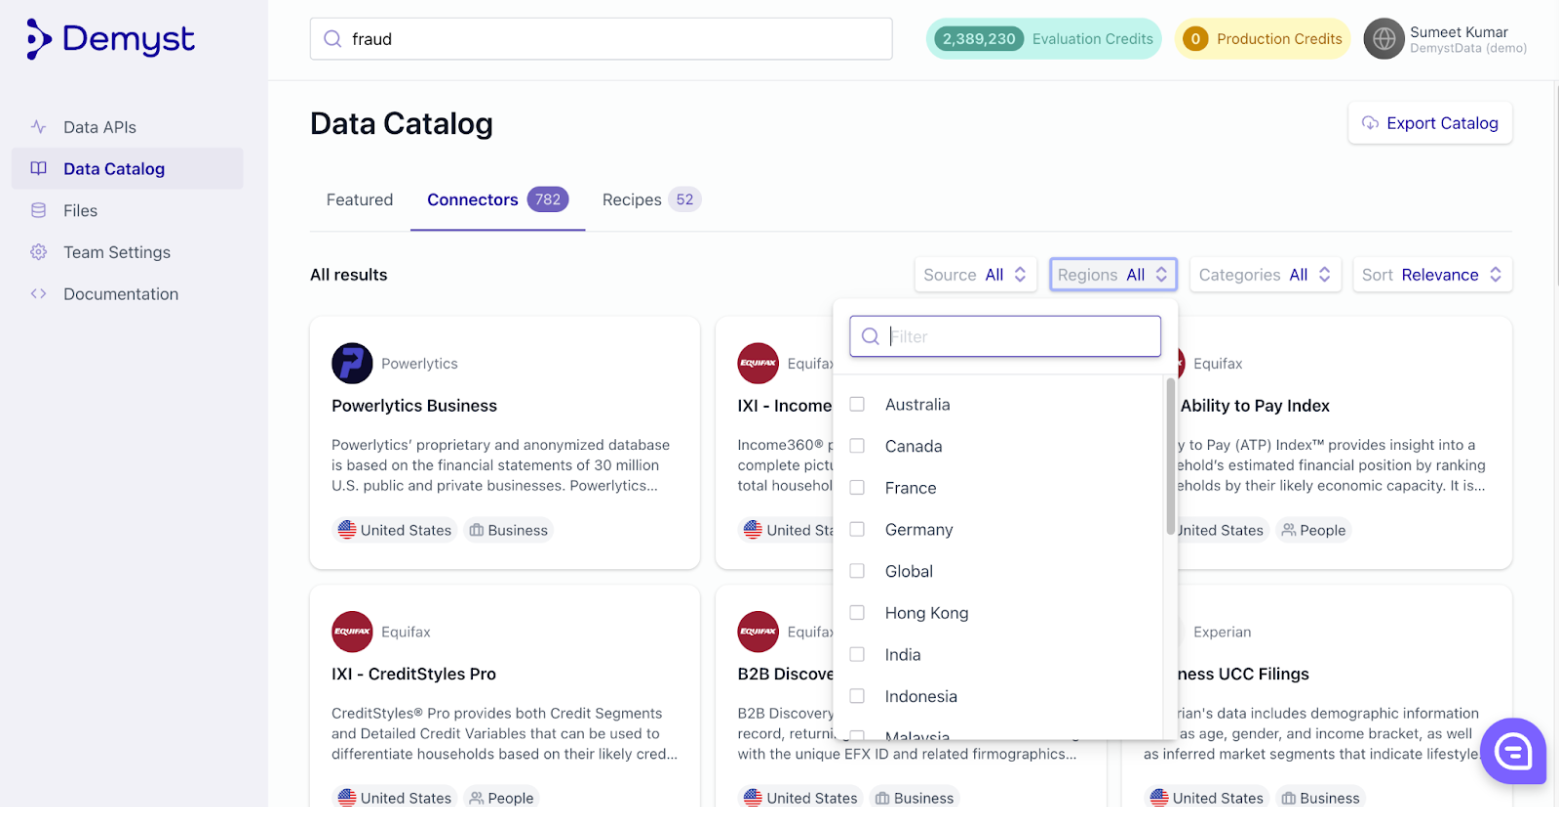
You can filter the connectors and recipes by source, regions, categories and sort them accordingly.
-
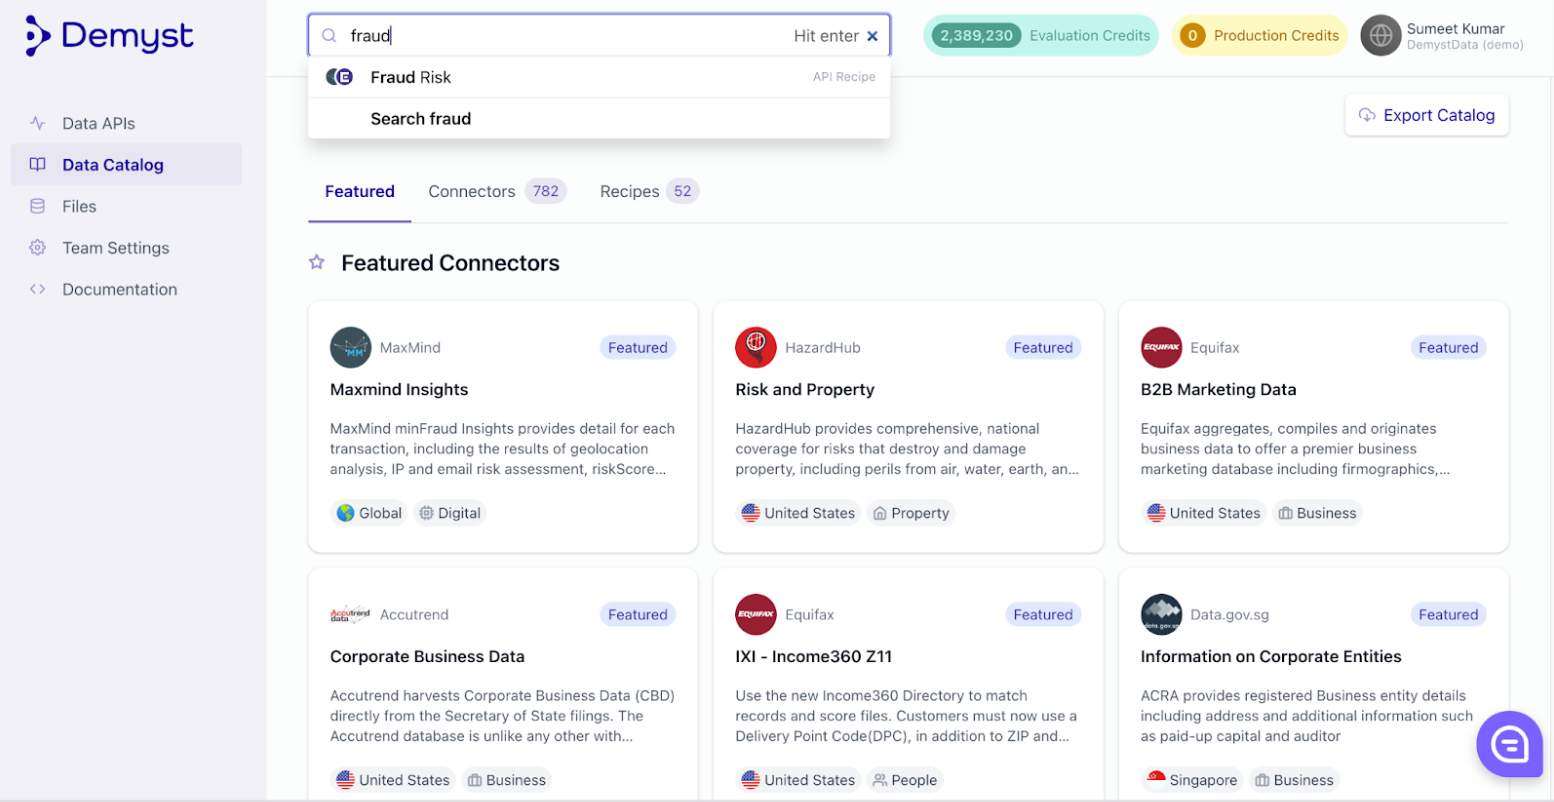
You can also make use of the search bar and type keywords and hit enter to view results.
-
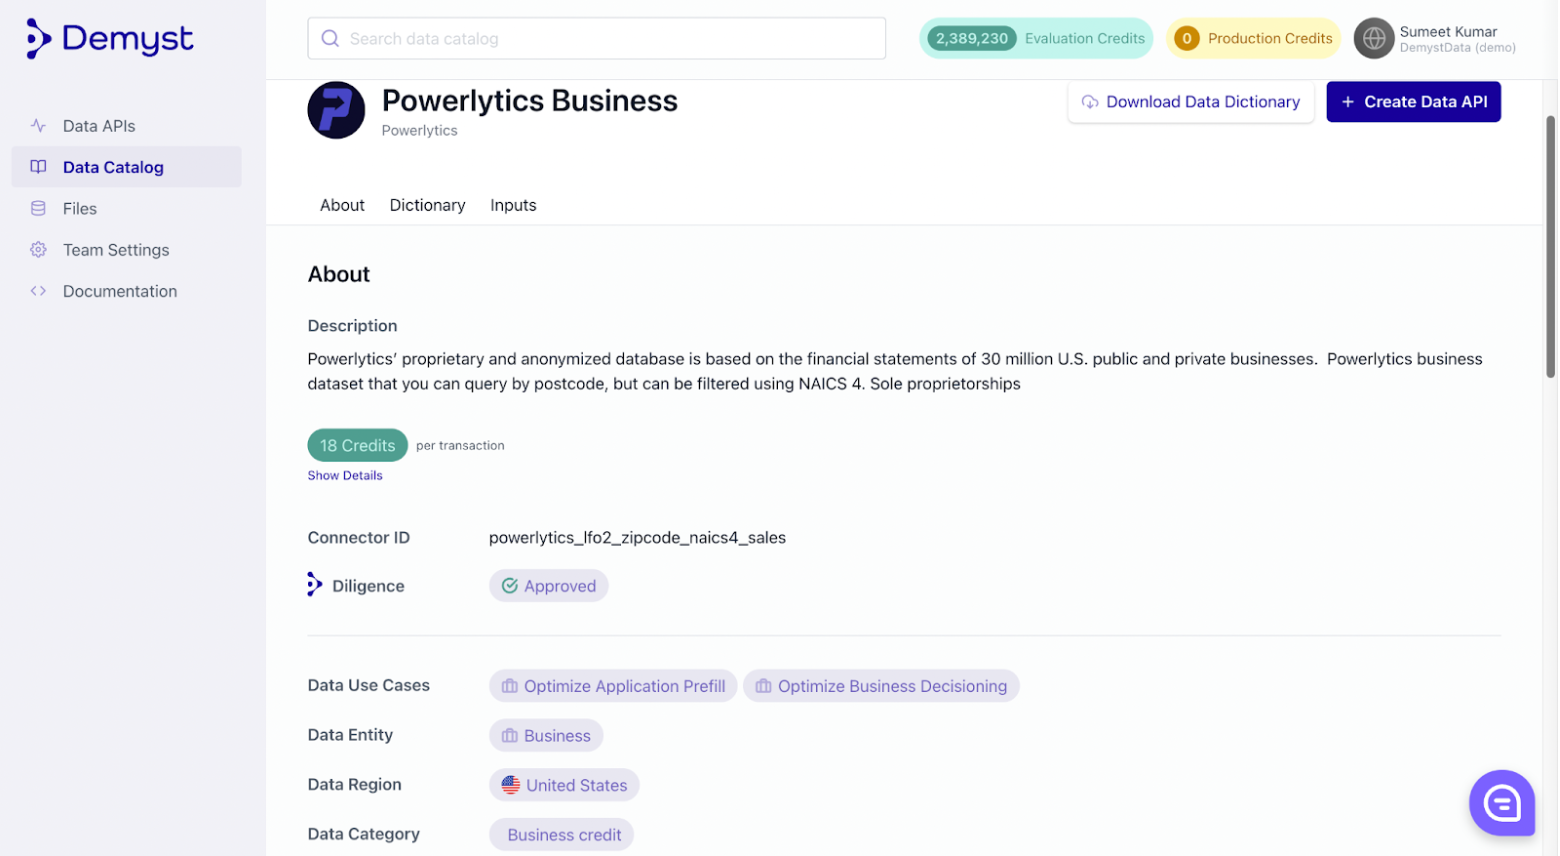
Explore specific data connectors by clicking on them. Their detail pages show more information:
-
Description displays the details about the connector.
-
A per transaction price for any calls against this connector as part of a Data API.
-
A Connector ID which is the referenceable name of the connector in any Data API configuration code.
-
Metadata for the connector to find out about the use cases, region, entity and category.
-
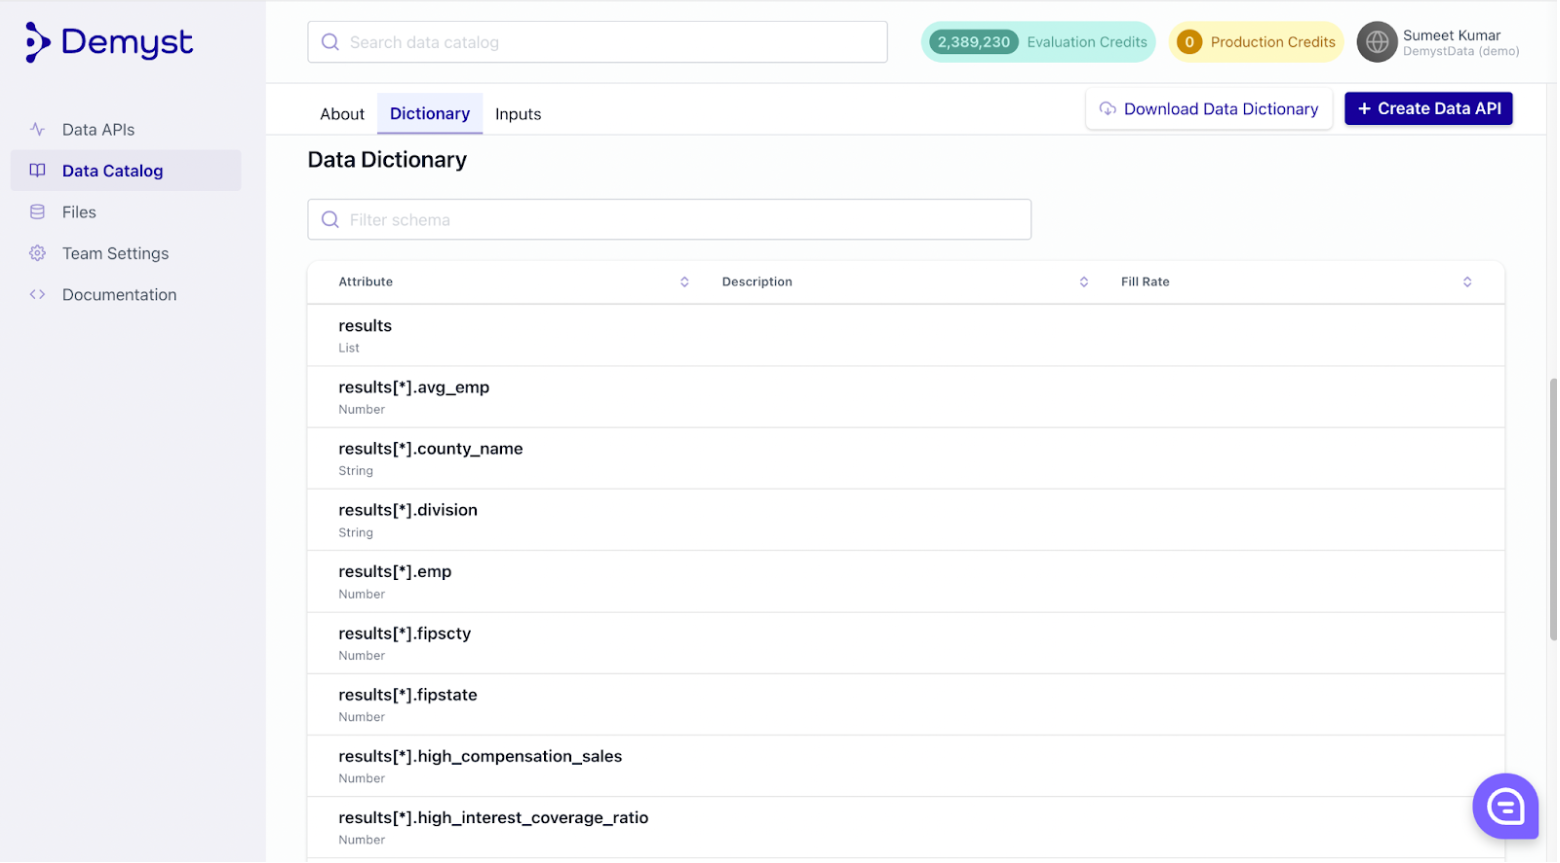
Data Dictionary to shows the output attributes of the connector
-
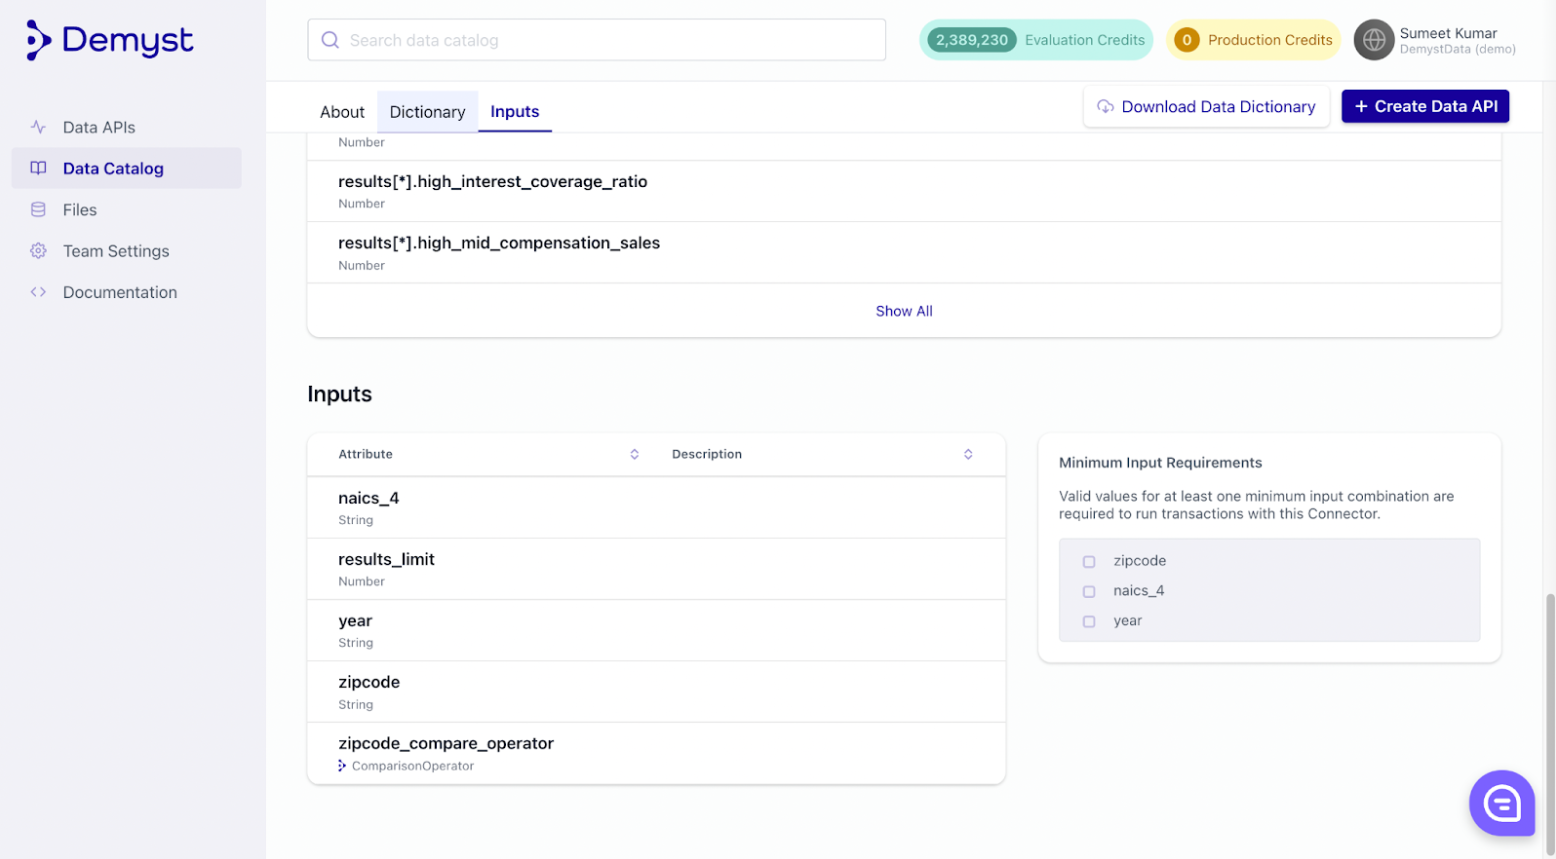
A list of inputs, and minimum requirements in order to a get a response when using this connector
-
-
If you are having difficulty finding a particular dataset or type of data, you can request assistance through the chat bubble on the bottom right of the Demyst platform. You can also contact our sales team directly.
This concludes the navigation of Demyst's Data Catalog to browse and find data of interest.
Step 3: Finding relevant recipes in the Data Catalog
Demyst's Recipes are template Data API configurations pre-built by Demyst that combine customizable logic and multiple datasets to solve common business problems. These external data solutions are available for immediate deployment through the Demyst platform.
Recipes can be reviewed in the Data Catalog to explore their applicability for common use cases, country coverage, pricing, and similar recommendations. Listings also include metadata to support easier browsing.
-
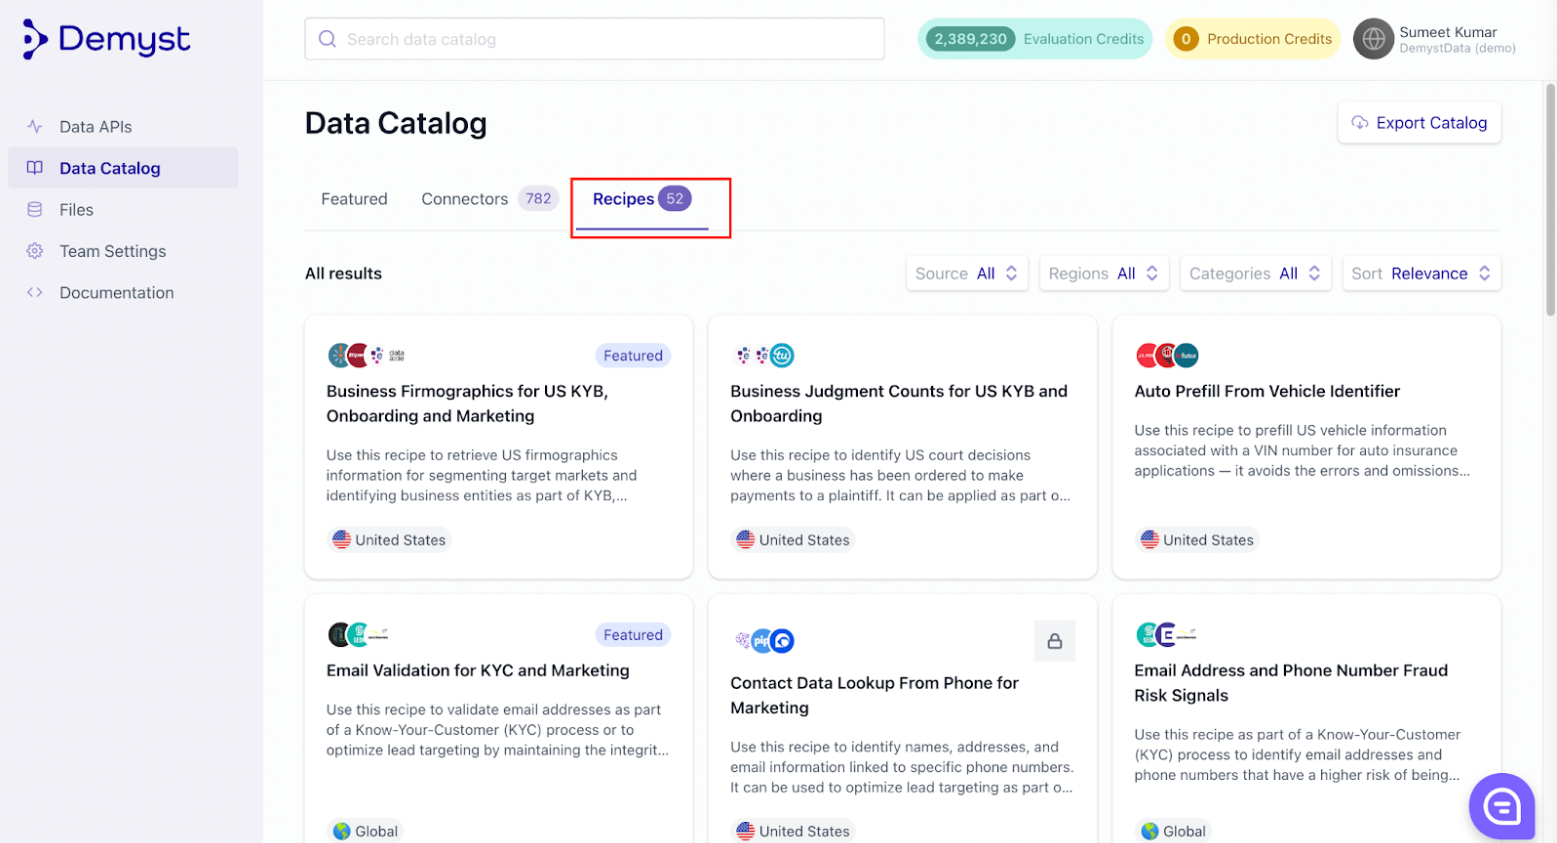
Navigate to the recipes tab in the Data Catalog page.
-
The same as with the Connectors tab, you can filter recipes by source, regions, categories and sort them accordingly, as well as making use of the search bar and type keywords to view results.
-
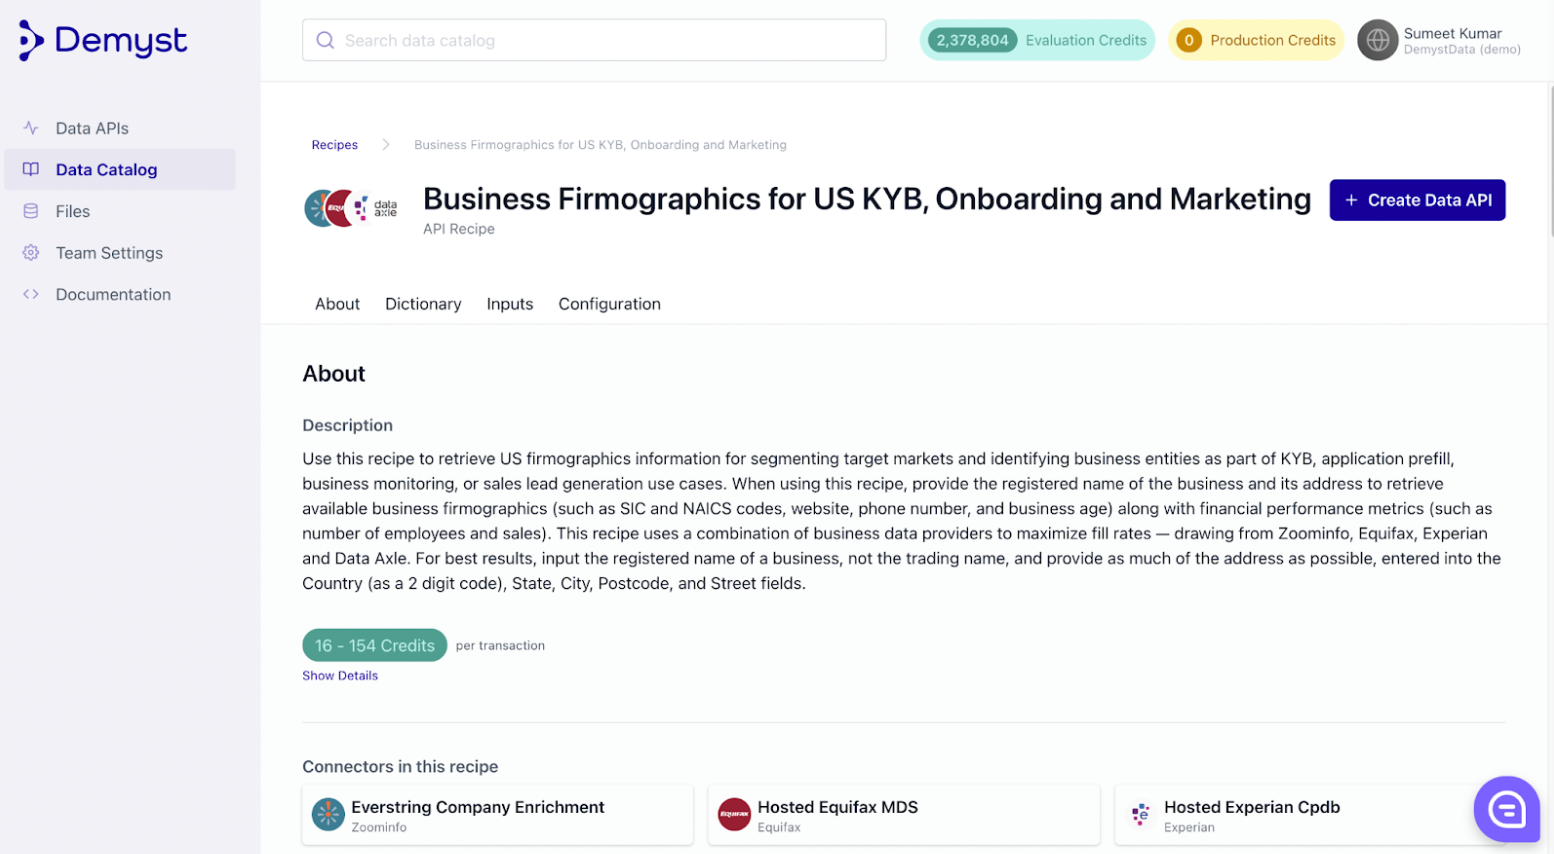
Explore specific recipes by clicking on them. Their details page shows further information:
-
The About section elaborates the recipe in detail.
-
A per transaction price for any calls against a Data API made from this recipe.
-
'Connectors in this recipe' lists what combination of connectors make up this recipe.
-
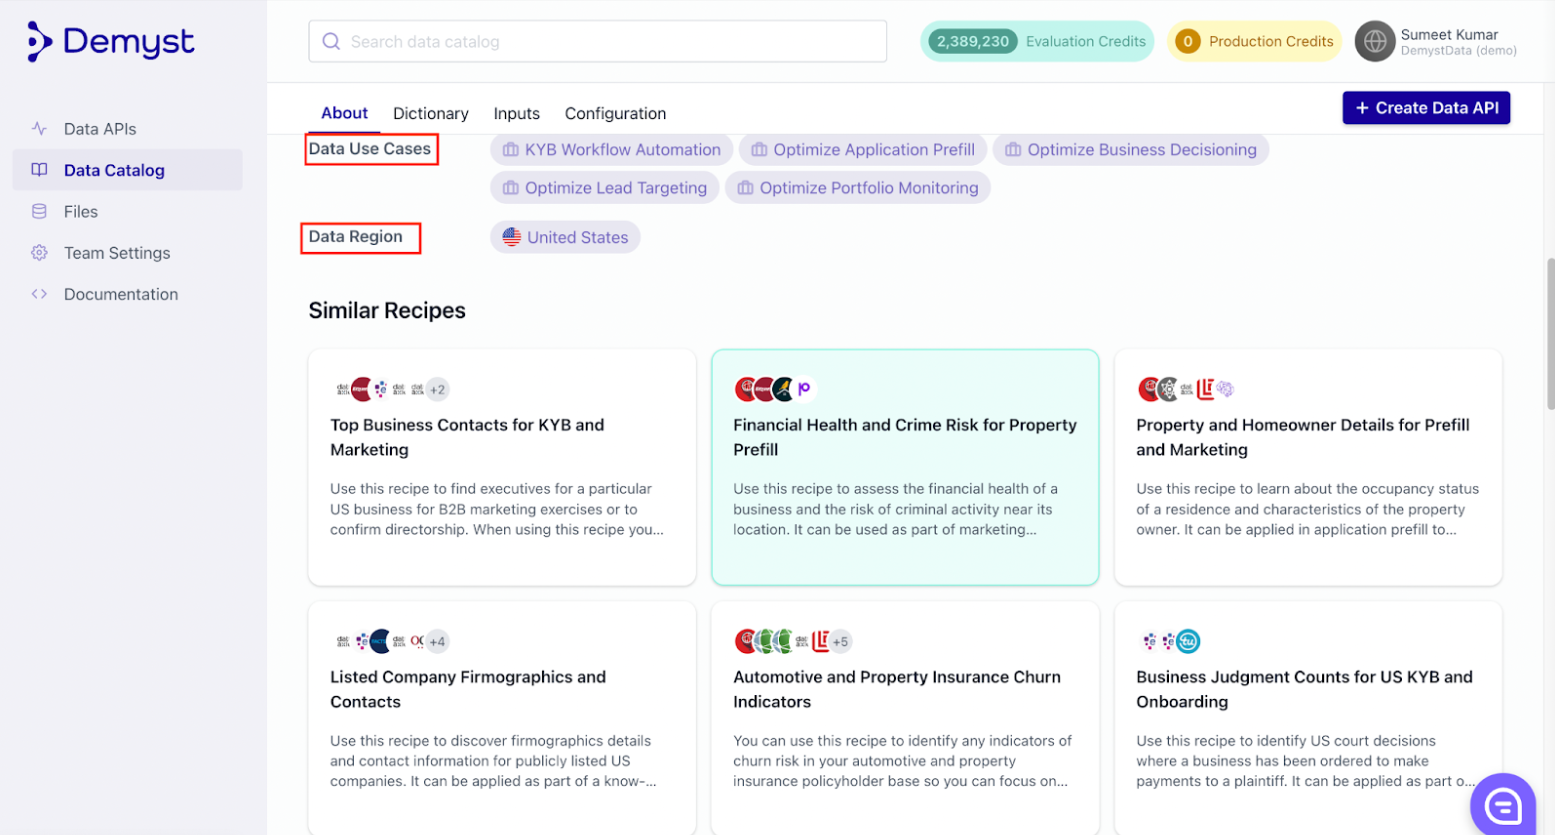
The metadata tells about the data use cases the recipe can be used for and it also shows the region where the recipe is applicable.
-
You can also browse through similar recipes in the Similar recipe section or go back to the recipe page and browse them as per your business requirements.
-
The data dictionary & inputs sections gives information about the data attributes it returns and the inputs that the recipe accepts respectively.
-
The configuration shows the JSON syntax that defines the recipe, including which datasets are used and what logic is applied.
-
-
If you are having difficulty finding a recipe to solve your problem, you can request assistance through the chat bubble on the bottom right of the Demyst platform. You can also contact our sales team directly.
This concludes the navigation of Demyst's Recipe Catalog to browse and find recipes for solving business problems.
Step 4: Creating and testing Data APIs
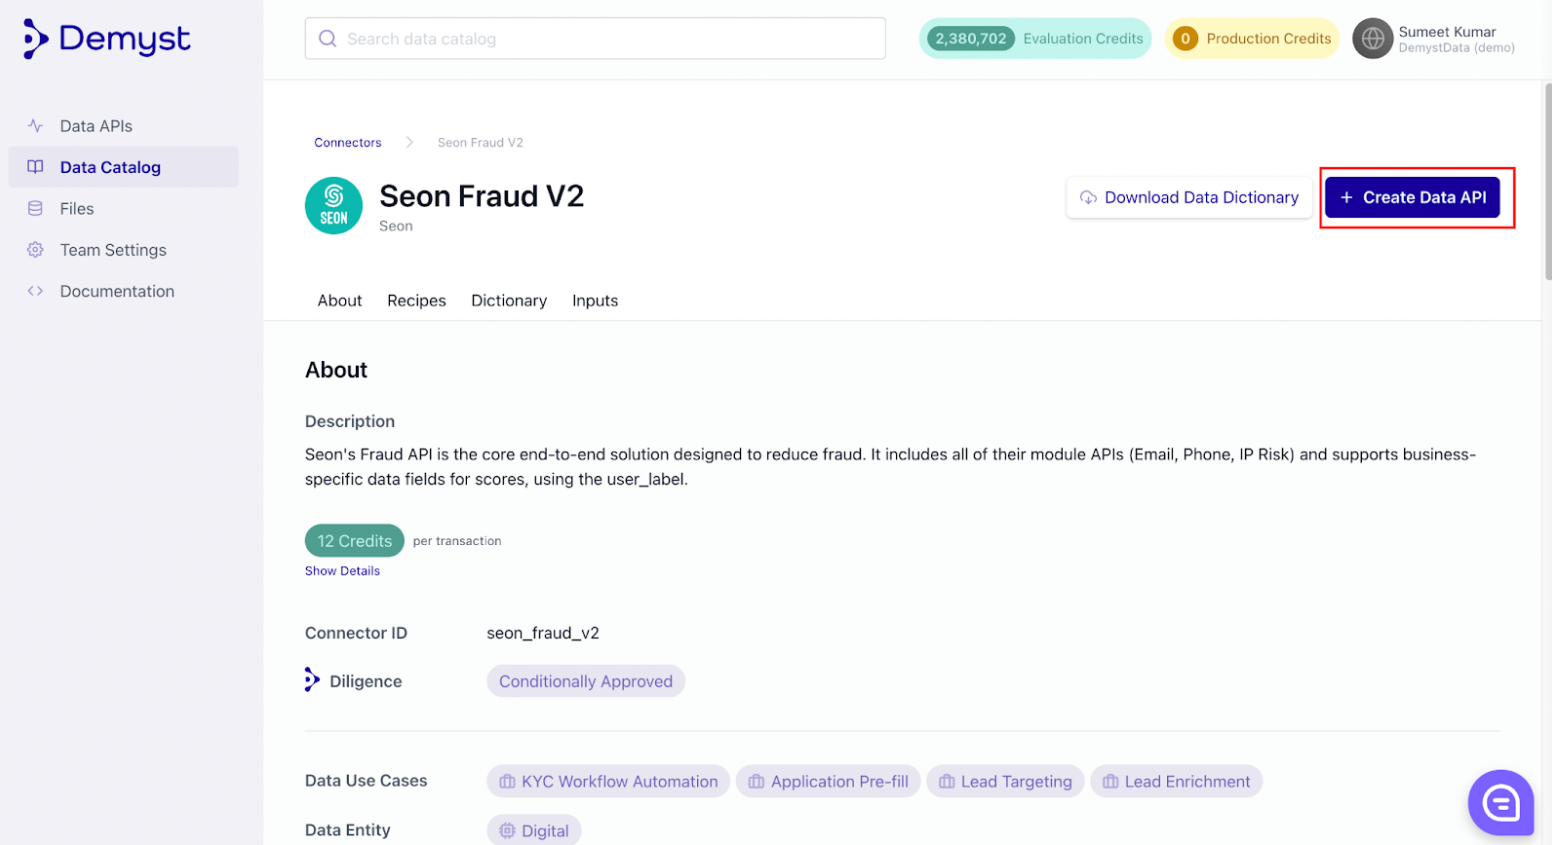
Data connectors and recipes from Demyst's catalogs can be used as the basis for Data APIs that are immediately available for evaluation.
-
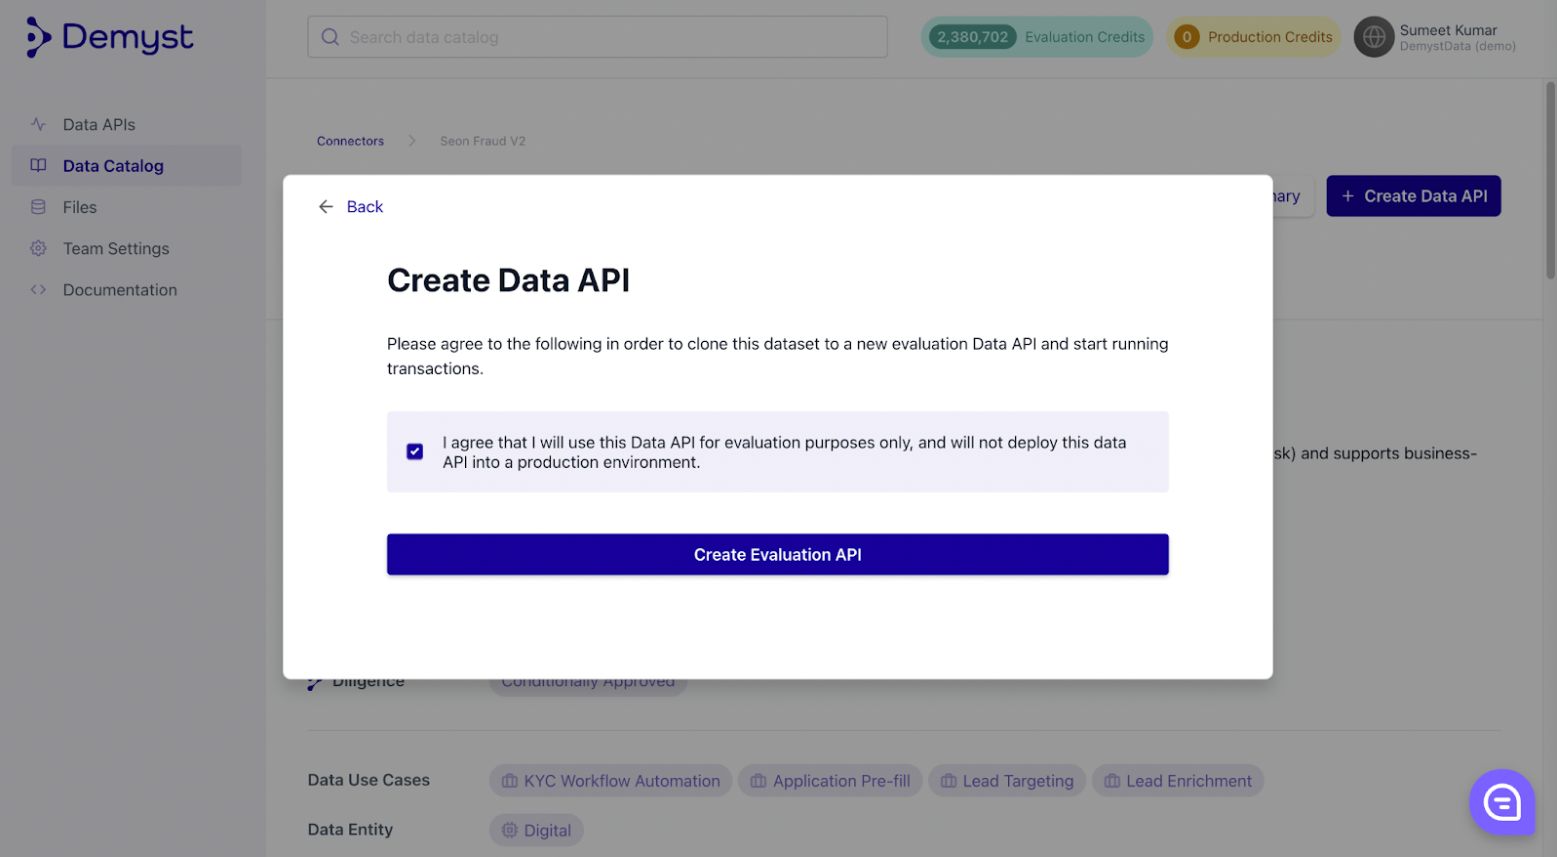
Data connectors and Recipes can be cloned with the "Create Data API" button, outlined in red below. Note that you must agree to use the data for evaluation purposes only.
-
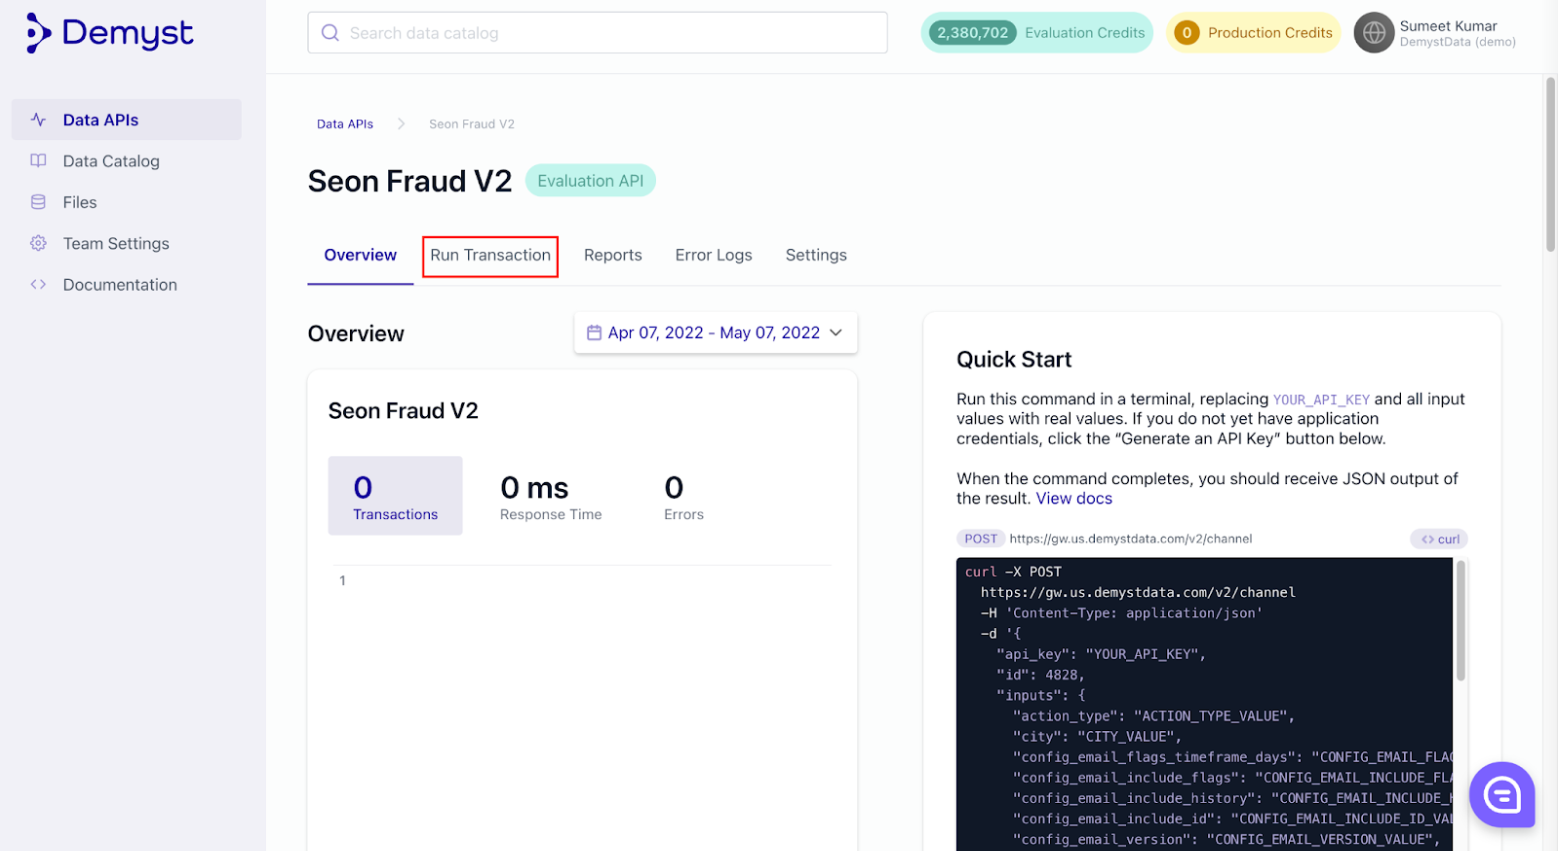
Clicking the button redirects you to the newly created Data API, which you can test with a set of inputs. Navigate to the "Run Transaction" section to run your first Data API."
-
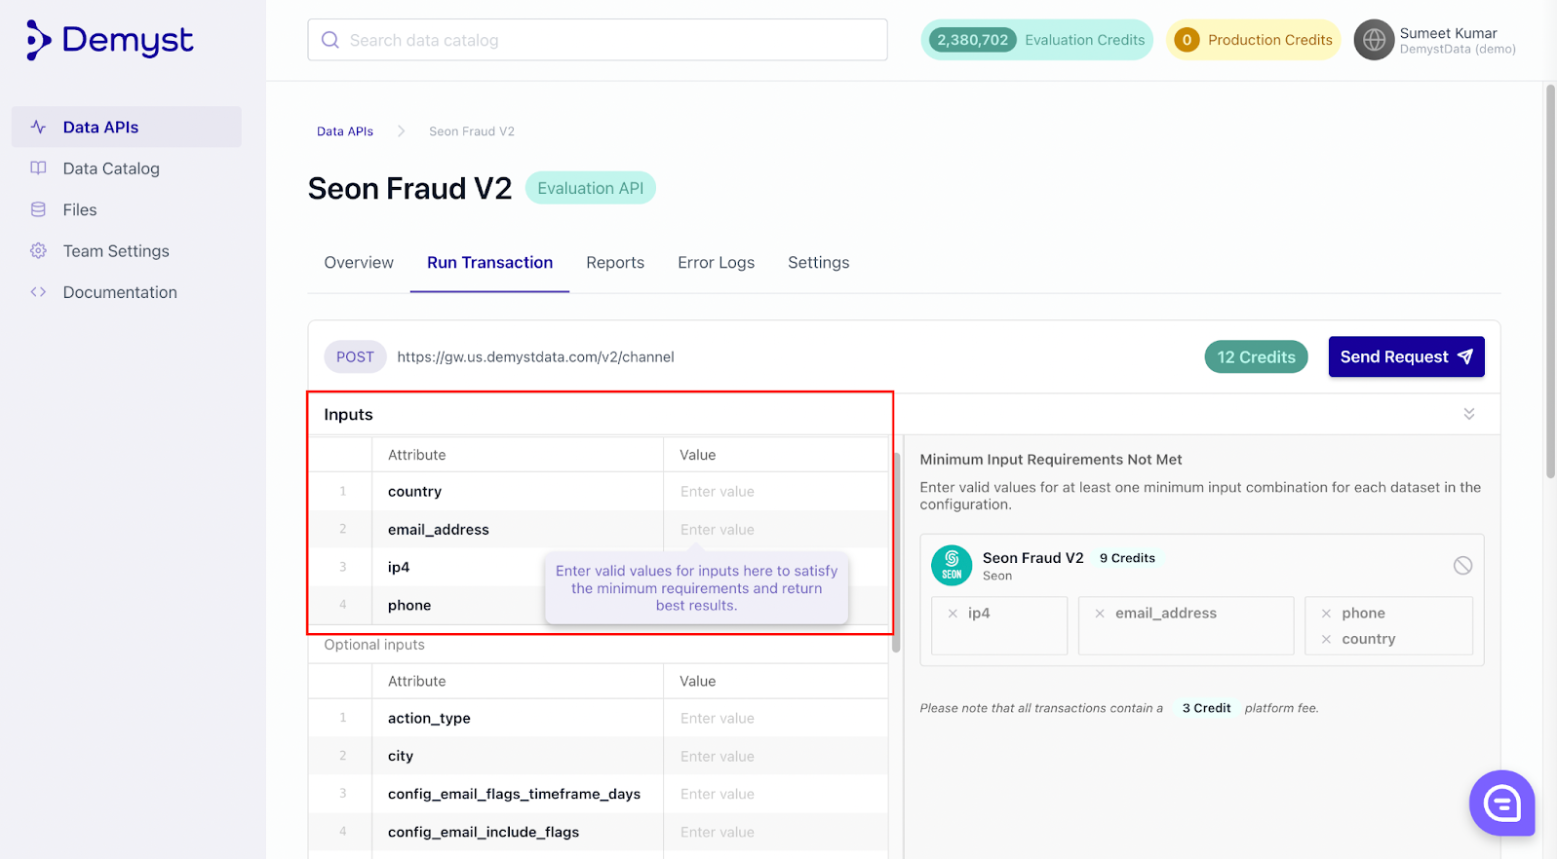
You must meet the requirements from at least one set of minimum input requirements listed on the right of the Data API screen before you can press "Send Request."
-
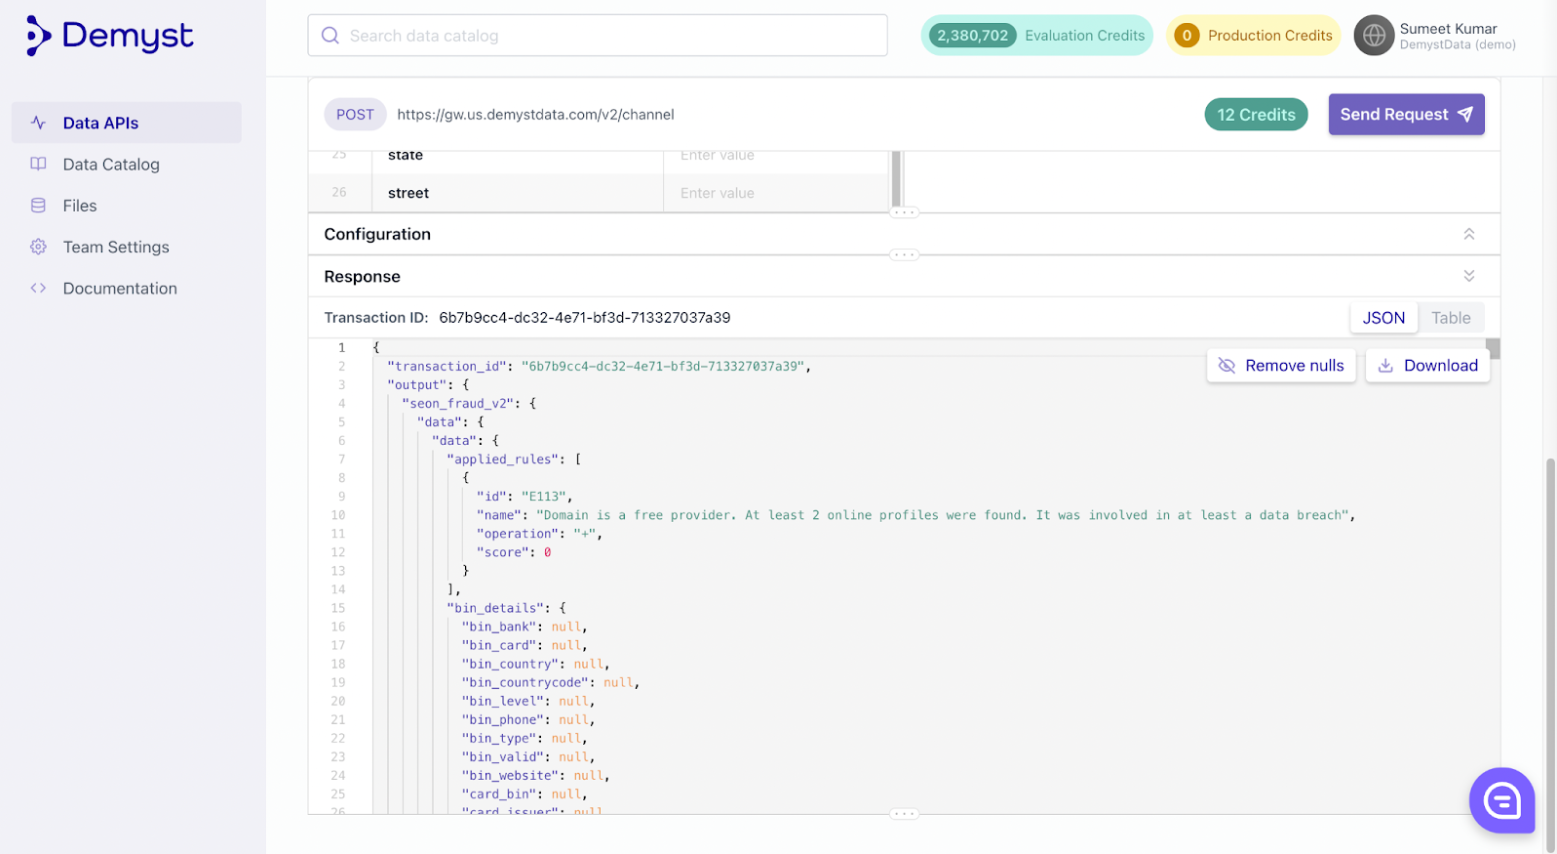
Your results are displayed in the "Response" section, presented in JSON/table format. If variables are listed in the "refine" section of the JSON response, they have been selected using the logic that was applied in the Data API's configuration. The data grouped under the "output" section of the JSON response is the complete set of returned variables, grouped by each dataset used in the Data API.
-
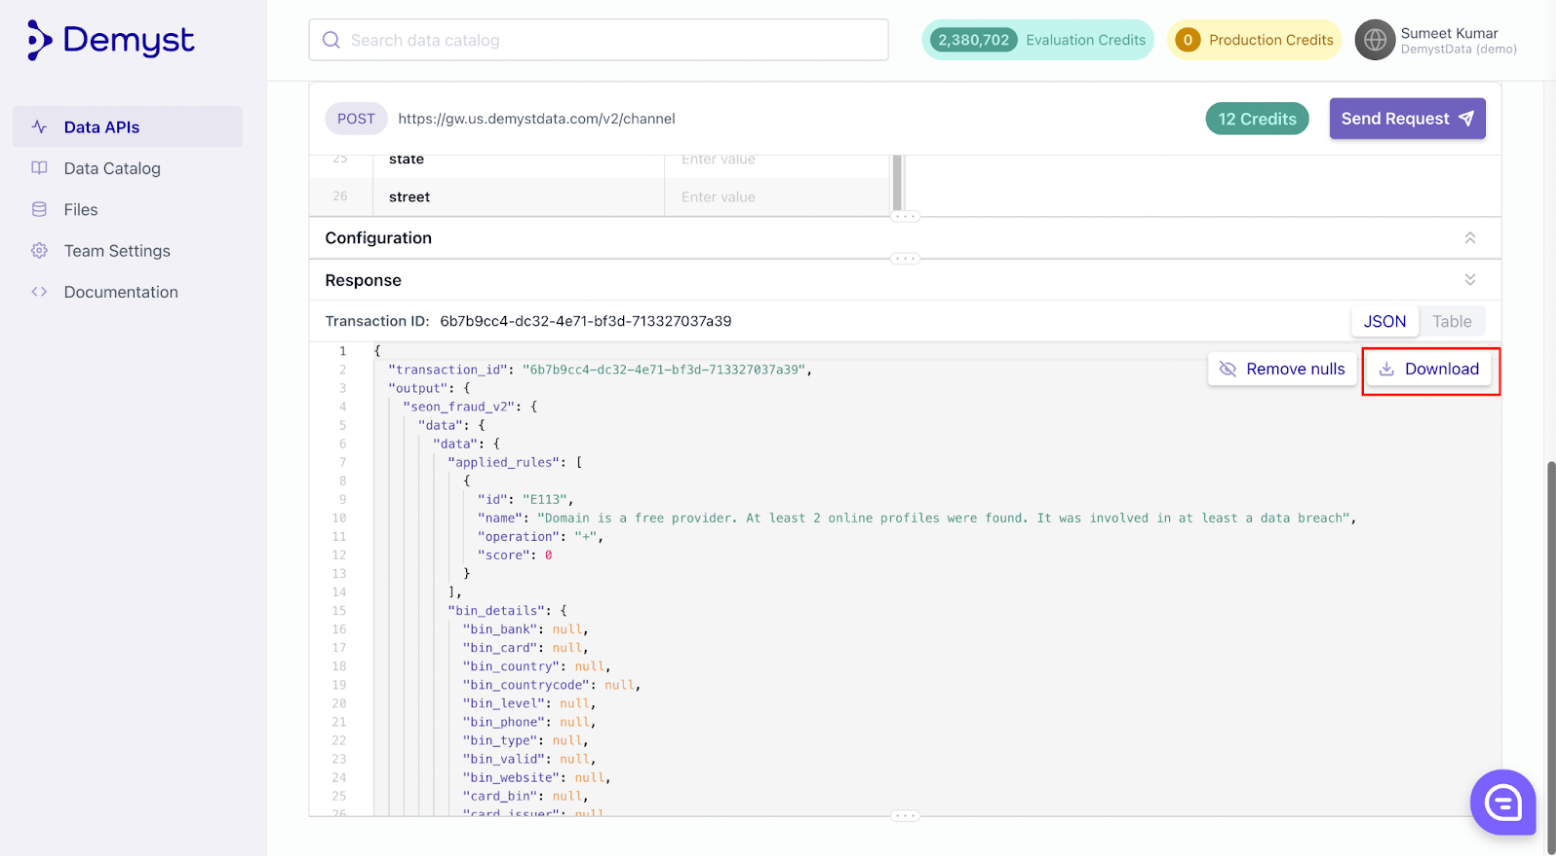
You can download the response by clicking on the download button.
This concludes the creation and testing of Data APIs.
Step 5: Editing the configuration of a Data API
Data API configurations can be edited to add or remove datasets and business logic — they can be customized to suit specific needs.
-
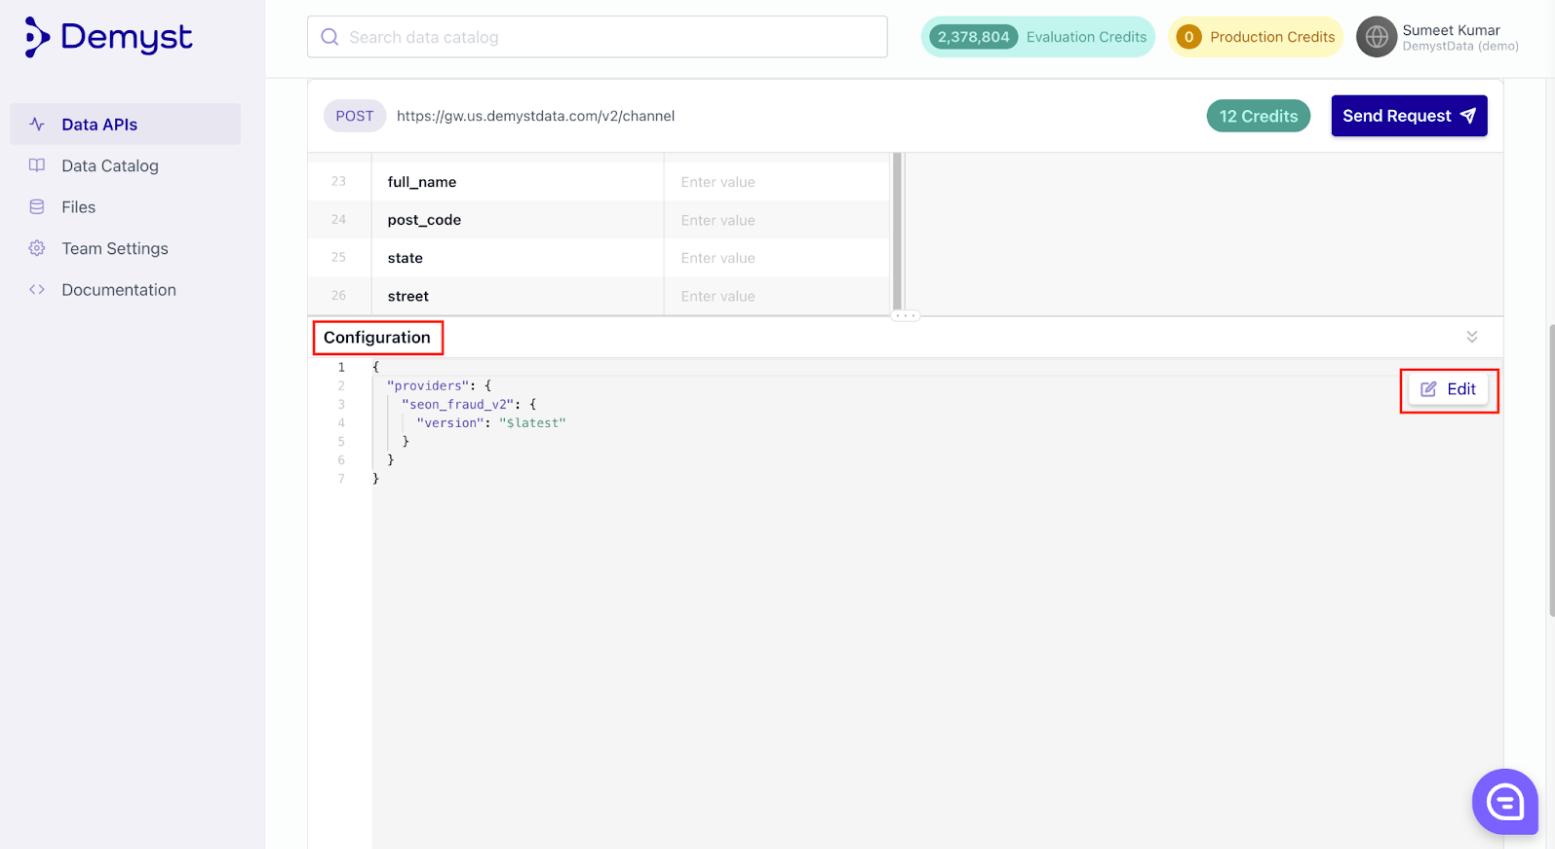
When viewing a Data API, click on 'configuration' to expand the section.
-
Click "edit" to make changes to the configuration JSON script.
-
The configuration section of the api contains:
-
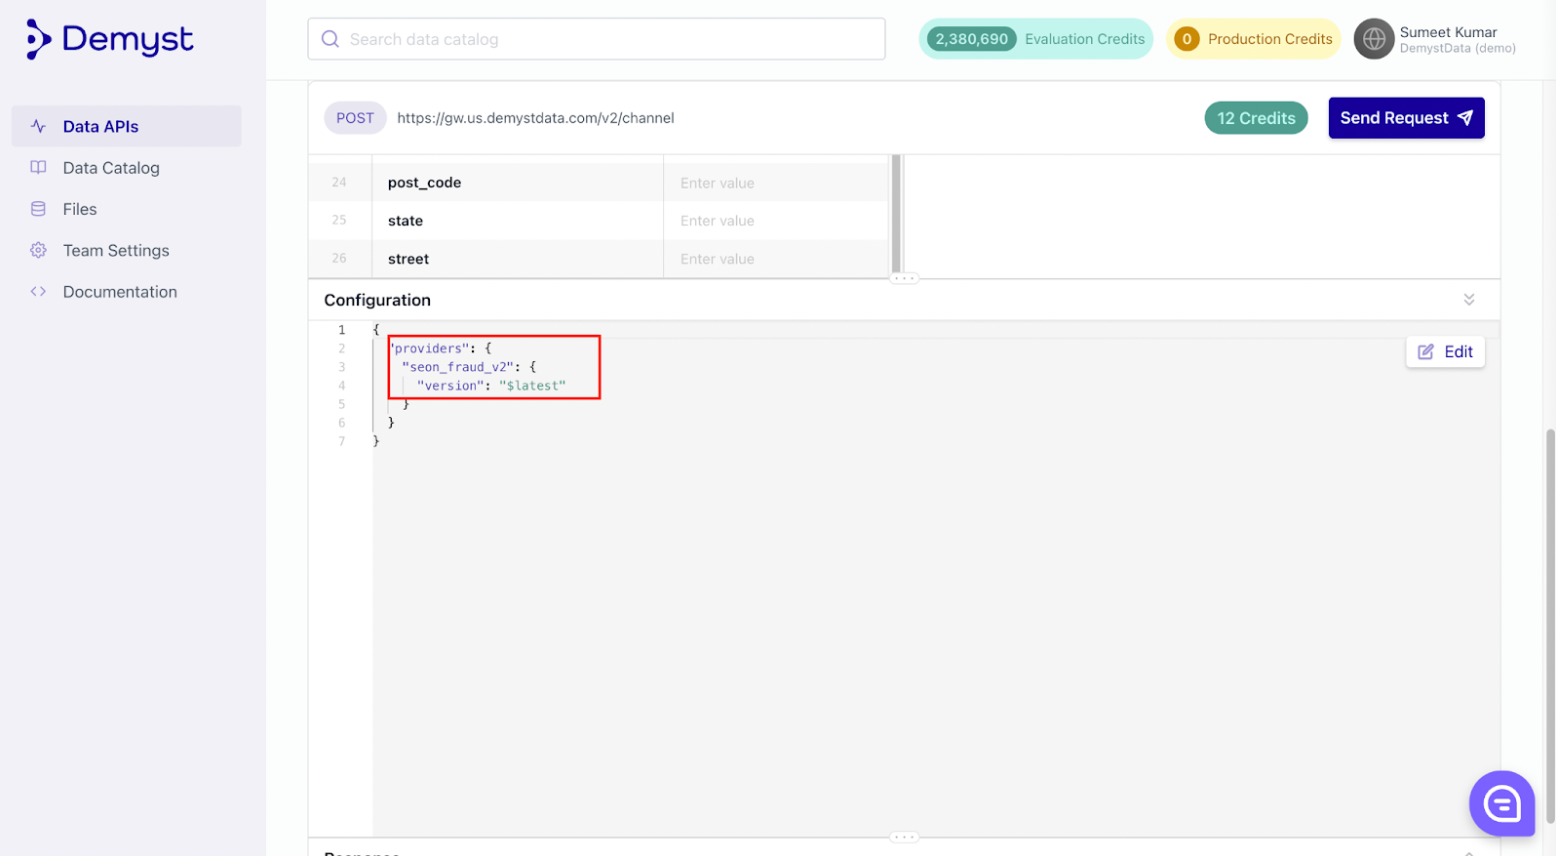
The provider section, including connector name, version and any specific inputs. Note that the name of the connector in the configuration section can be found in the Data Catalog as referenced by 'Connector ID'.
-
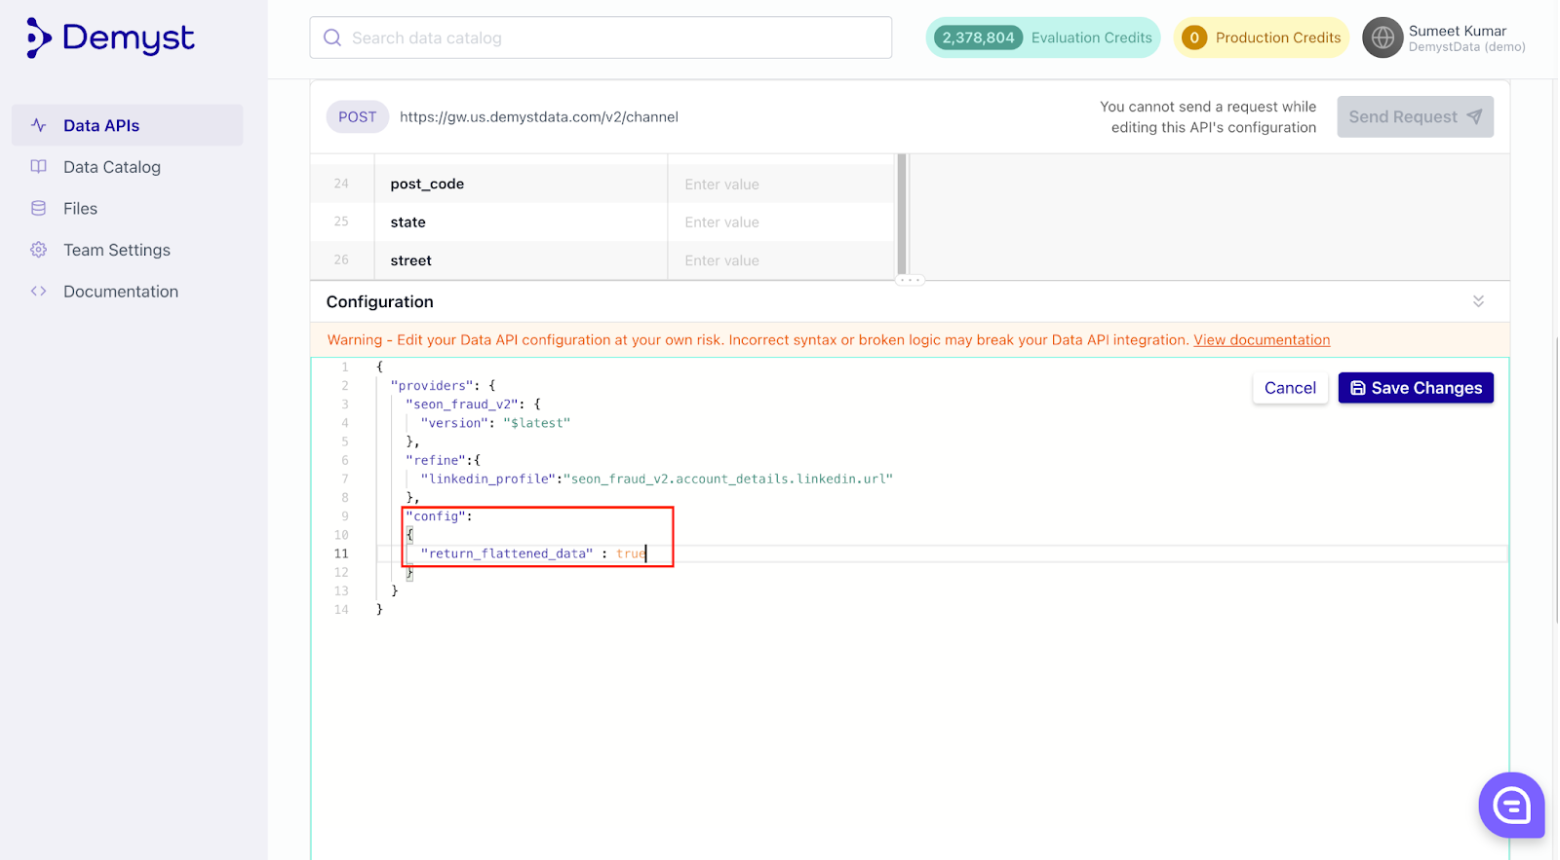
The refine section, for adding specific variables from any included connector or creating new variables involving any supported logic.

-
The config section, for overall settings applied to the data api such as to return only sample data.
-
-
Refer to the API configuration documentation for the complete set of configuration functionality.
-
Some simple examples include:
-
Adding the following text under the "provider" section to include a new dataset:
                            "dataset_name": {
                                "version": "$latest"
                            }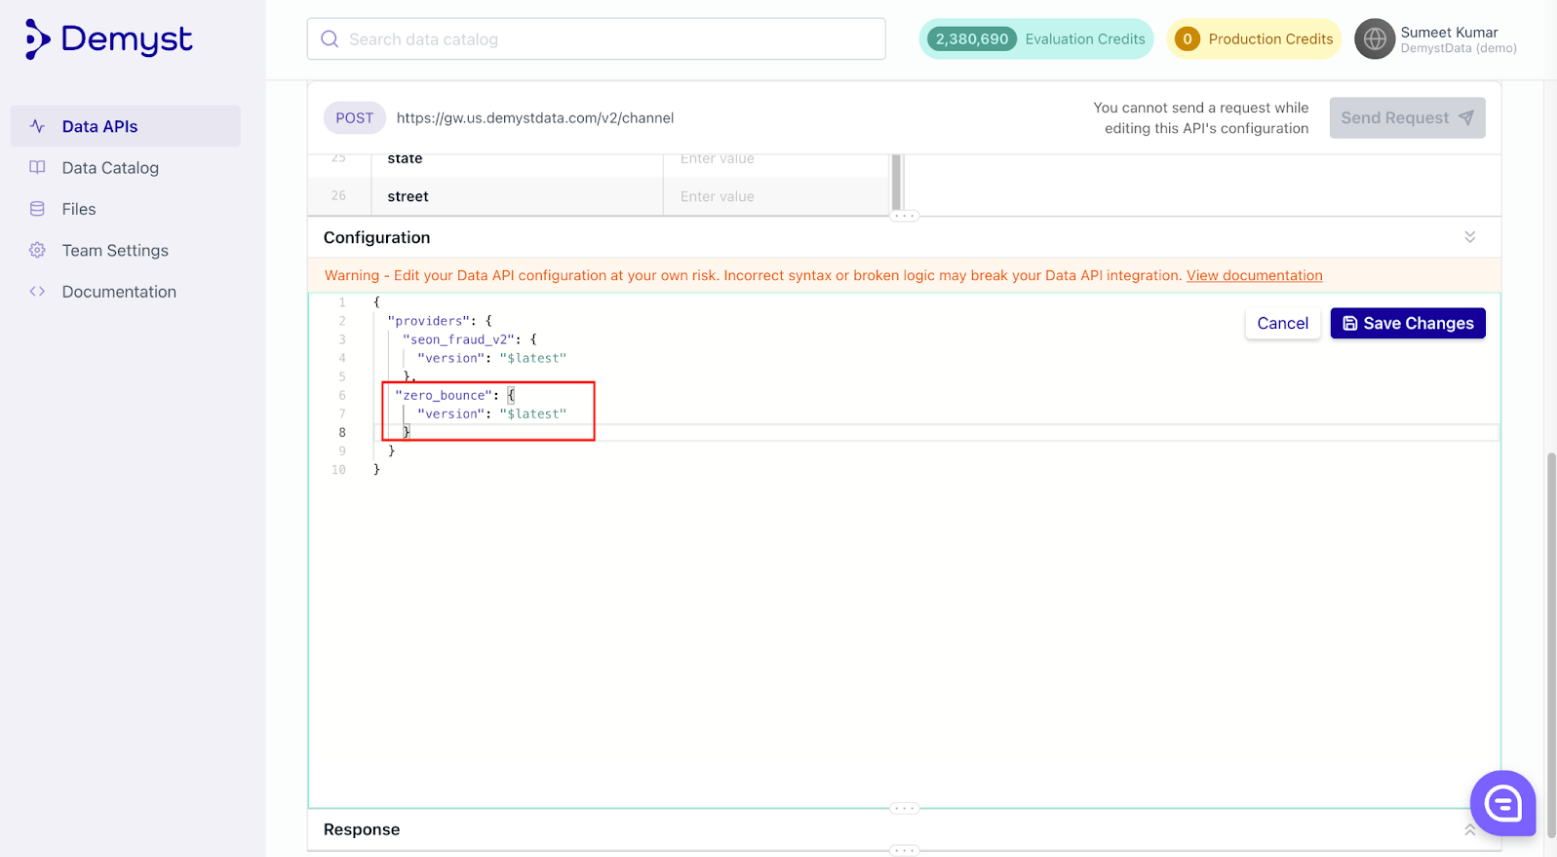
-
Adding a variable into the refine section:
"what_you_want_to_call_this_variable": "dataset_name.variable_path"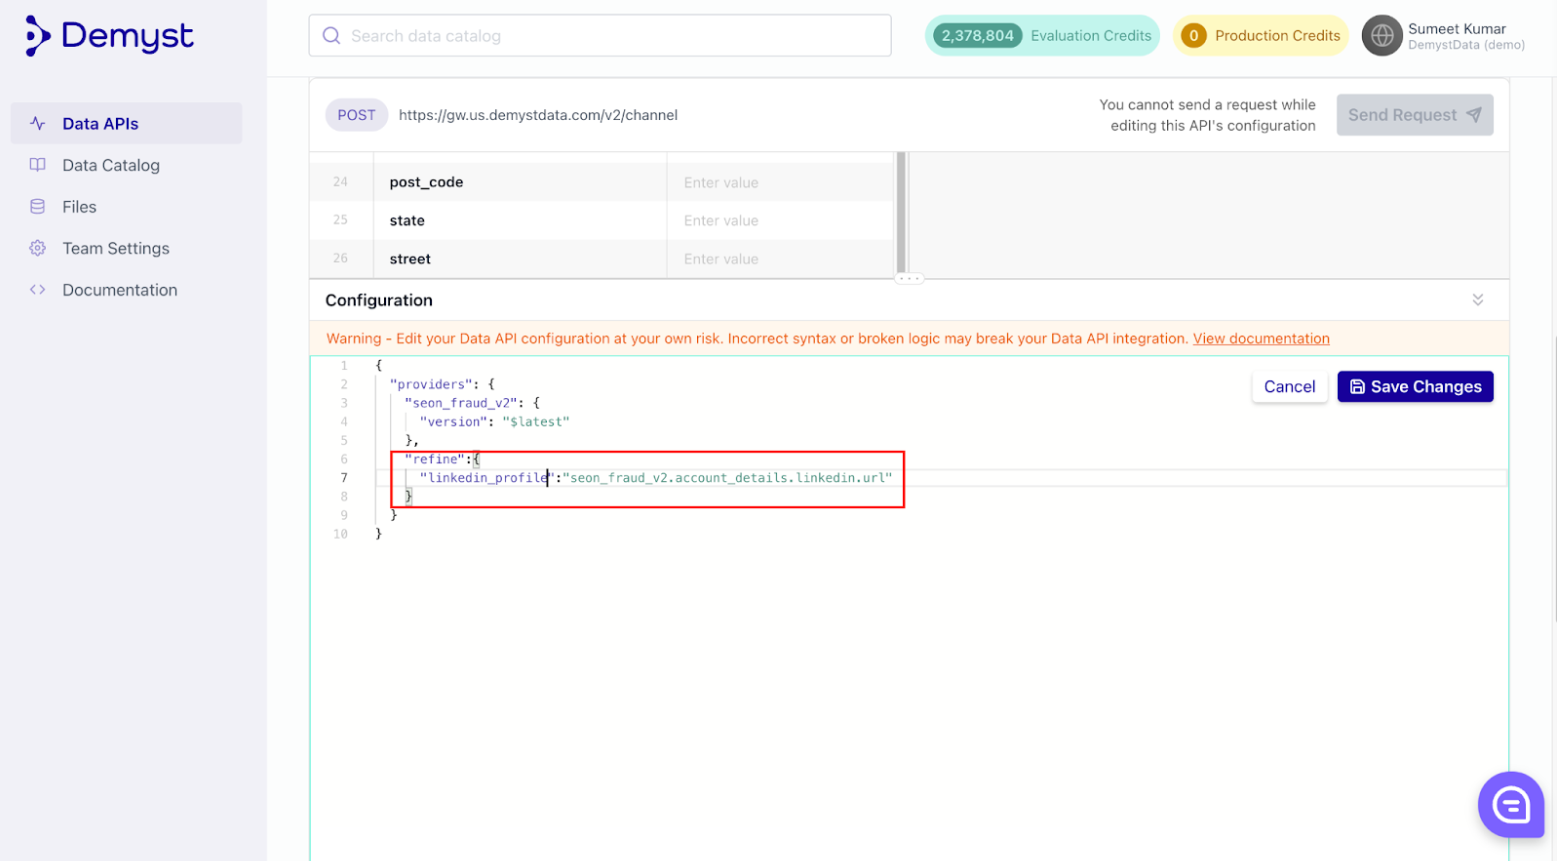
-
-
Remember to click "save changes" so that your Data API edits are applied. Test the edited API to check your results.
This concludes making edits to the configuration of a Data API.
Step 6: Running a programmatic request against a Data API
Once Data APIs are built in the Demyst platform, they are typically run programmatically, outside the platform, as part of core applications or workflows. One way of doing this is through a curl request.
To access a Data API in another way or learn about Data API integrations in more detail, refer to our API Integration documentation.
-
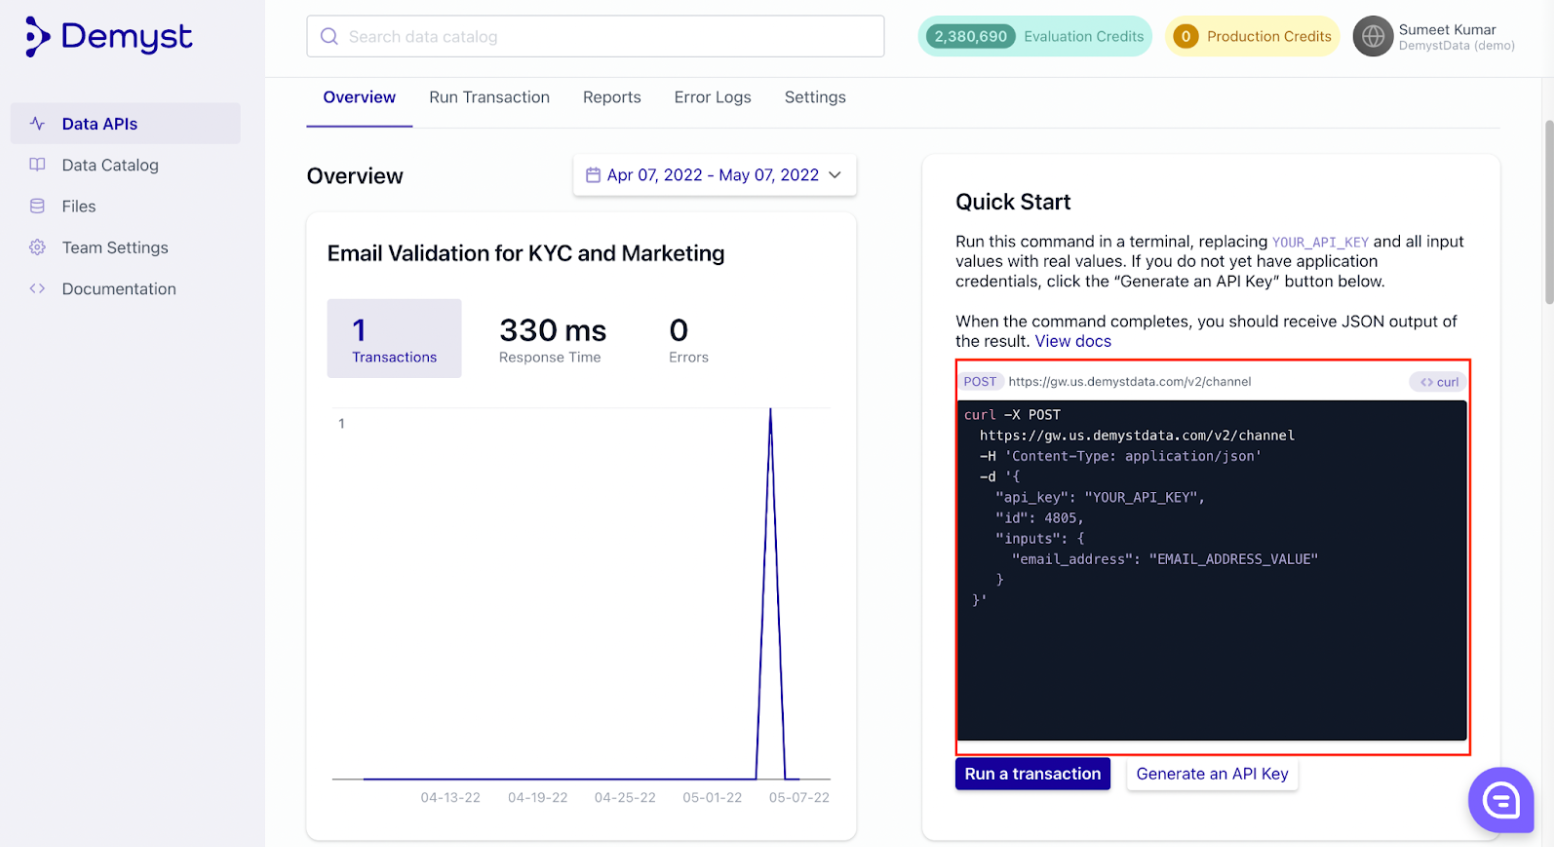
Navigate to the Data APIs overview section, and click into the Data API you created in previous steps.
-
Copy the code from the Quick start section and paste it in a text editor. It will be easier to run it later, once you have an API key and other necessary information.
-
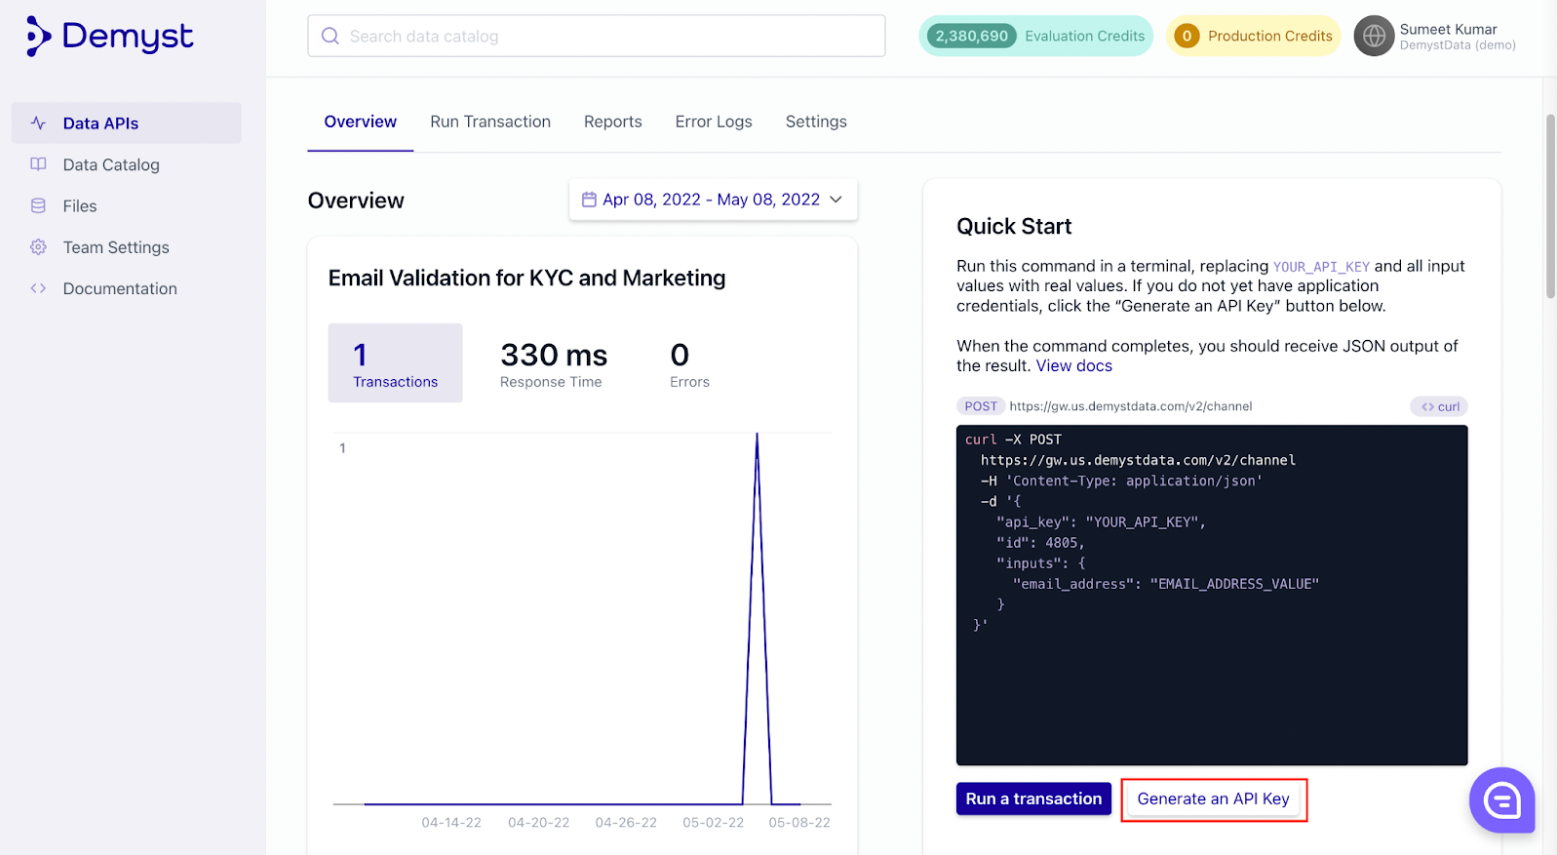
If you do not yet have an API key yet, click the "Generate an API Key" button below the quick start code.
-
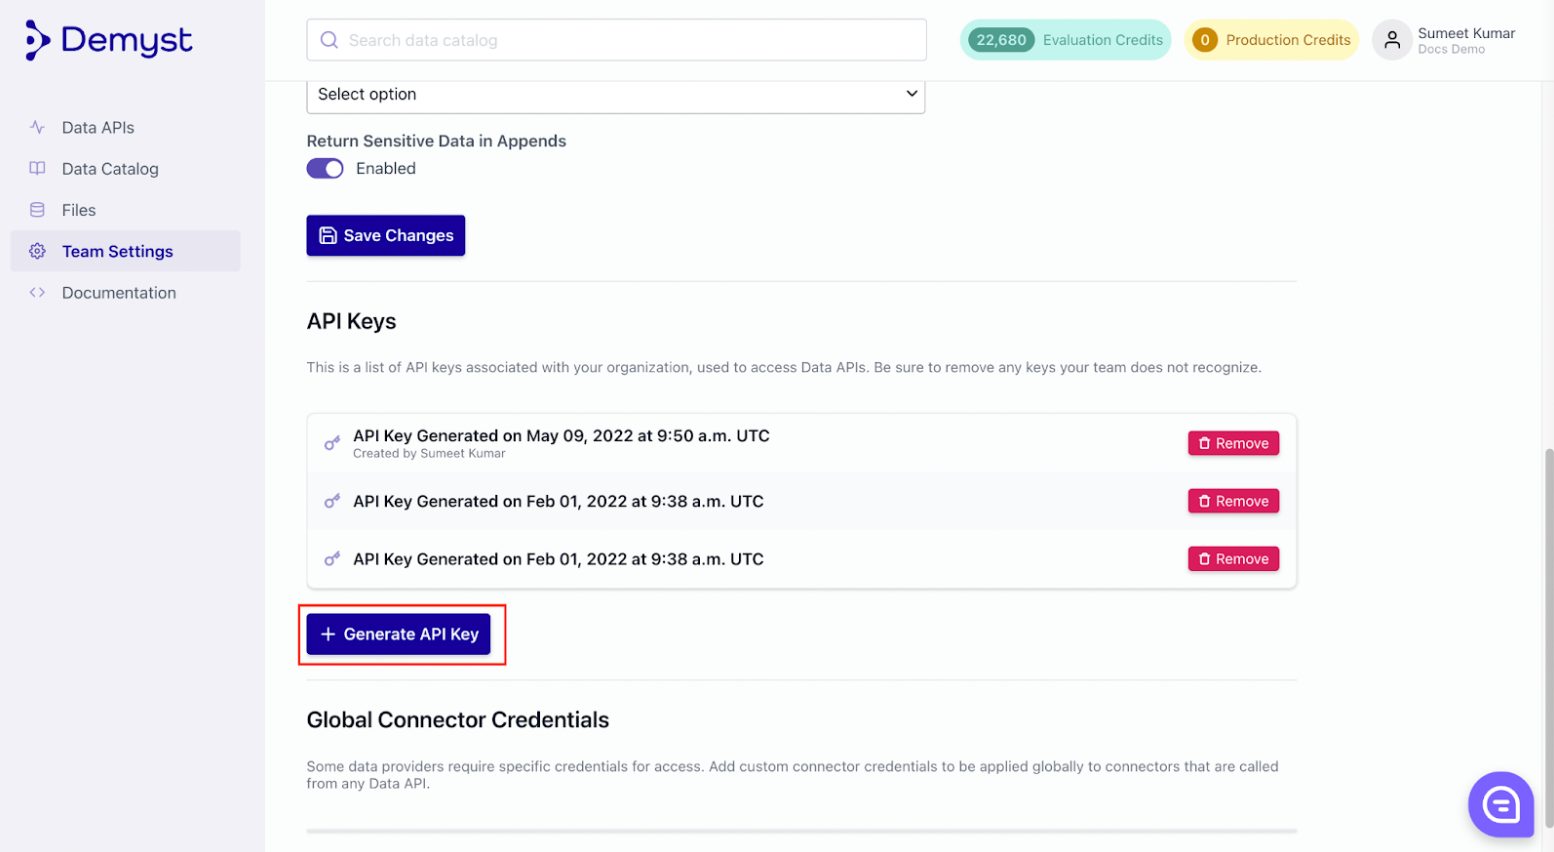
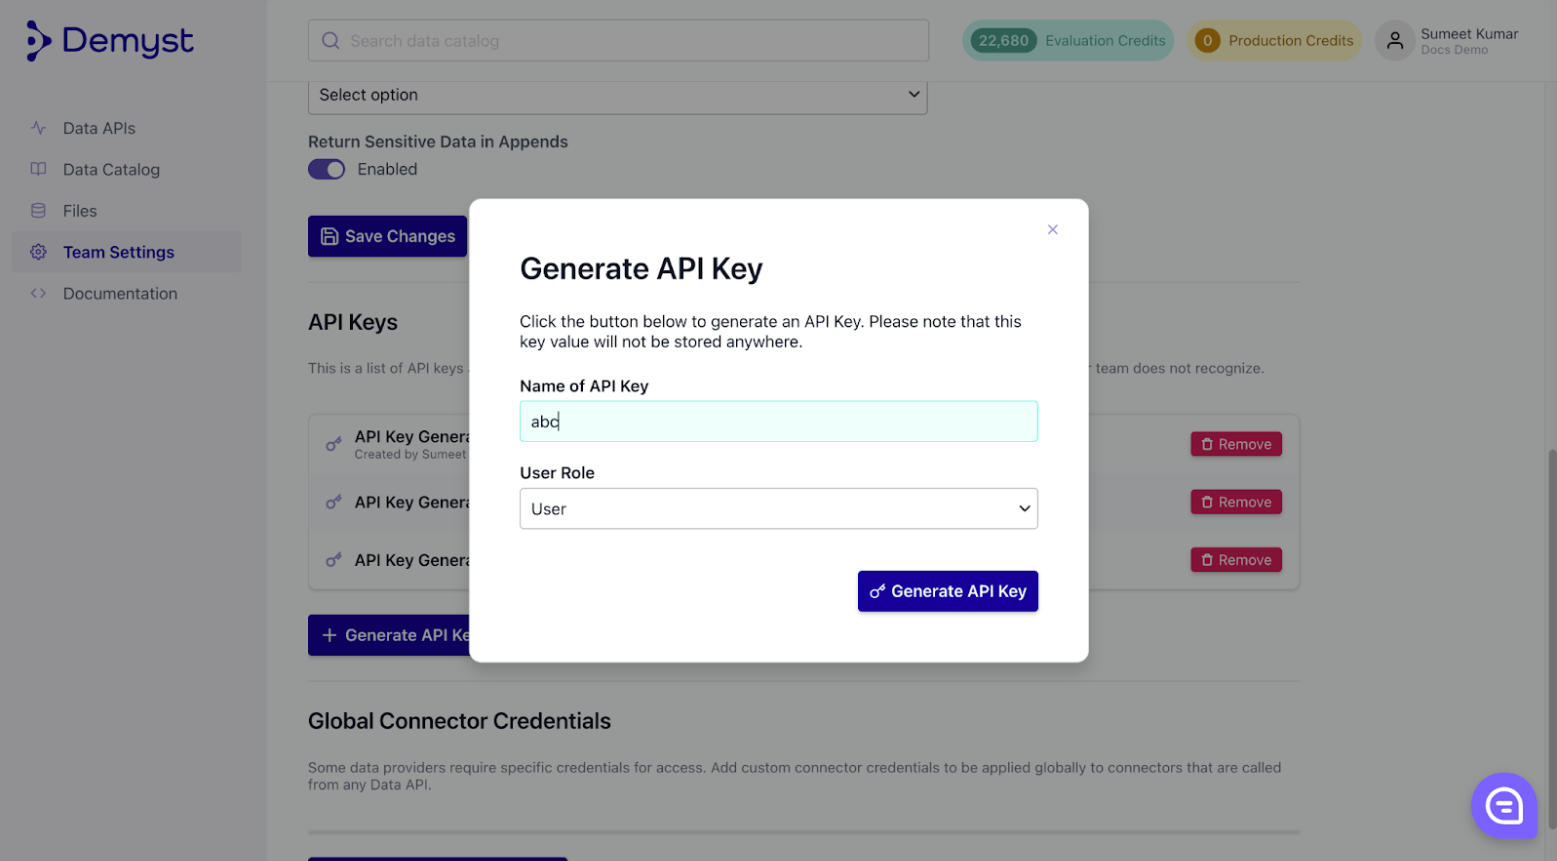
Click on generate API key and navigate to the screen below by scrolling down.
-
You can generate an API key by clicking on the 'Generate API Key' button by providing an appropriate name for the key and mentioning the 'user' role. A popup on screen will show your successfully generated API key. Copy this information, save it, and manage it appropriately. The API key is not viewable once you navigate away from the popup screen.
-
A popup on screen will show your successfully generated API key. Copy this information, save it, and manage it appropriately. The API key is not viewable once you navigate away from the popup screen.
-
Once the key is generated, you can replace it in the code in the terminal.
-
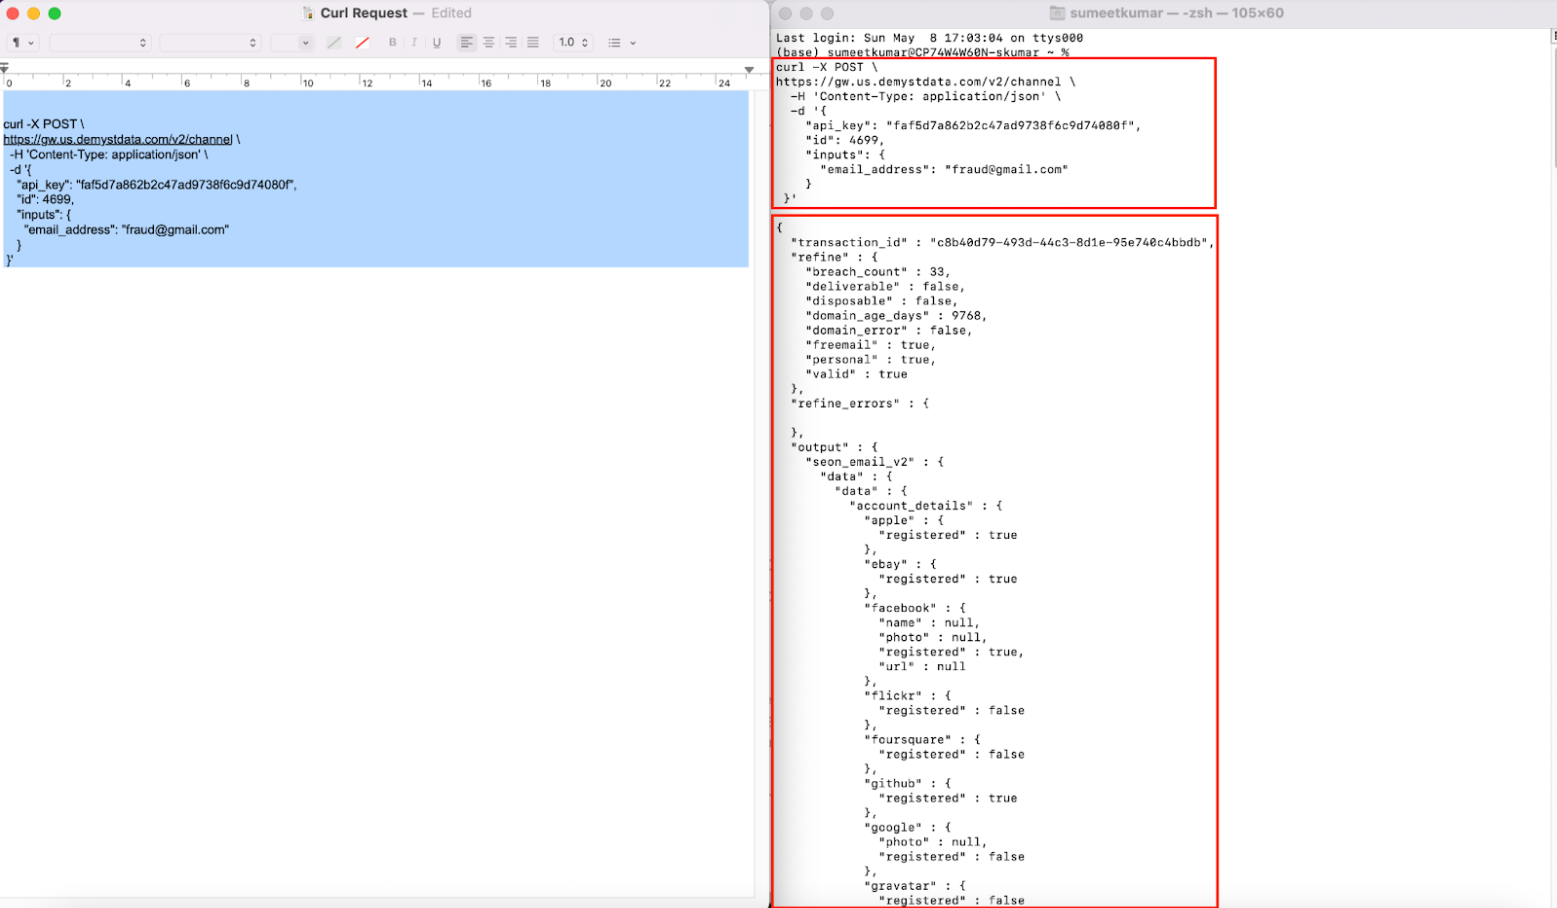
Complete the sample curl request with your API Key, and add the same inputs that were used when testing your Data API in the Demyst platform. Paste the completed curl request which you saved earlier in a text editor into your terminal and press enter to run it. The available results will match the results that would be seen in the platform. For example in the screenshots below, we have:
-
Added the API key next to "api_key" on the left in the text edit window
-
Added an appropriate value for the only required input of "email_address" on the left in the text edit window
-
Copied the text from the text edit window on the left, pasted it into a terminal window on the right, and pressed enter to run
-
This then generated the response in the second highlighted box in the terminal window on the right
-
This concludes running a programmatic request against a Data API using curl request, which would be done in a production workflow.
Step 7: Moving a Data API from evaluation to production
After an API has been edited and configured to suit a specific business need, it must be transitioned from an evaluation API to a production API. This change allows organizations to use APIs for production purposes, and it enables billing for data usage, but the API cannot be edited further.
Please reach out to your Demyst account manager to promote your Data API to production.
This concludes the creation of a Production API.
Step 8 : Viewing Reporting Dashboards
Production APIs can be monitored for performance and billing purposes. This is facilitated by Demyst's Data API dashboards.
-
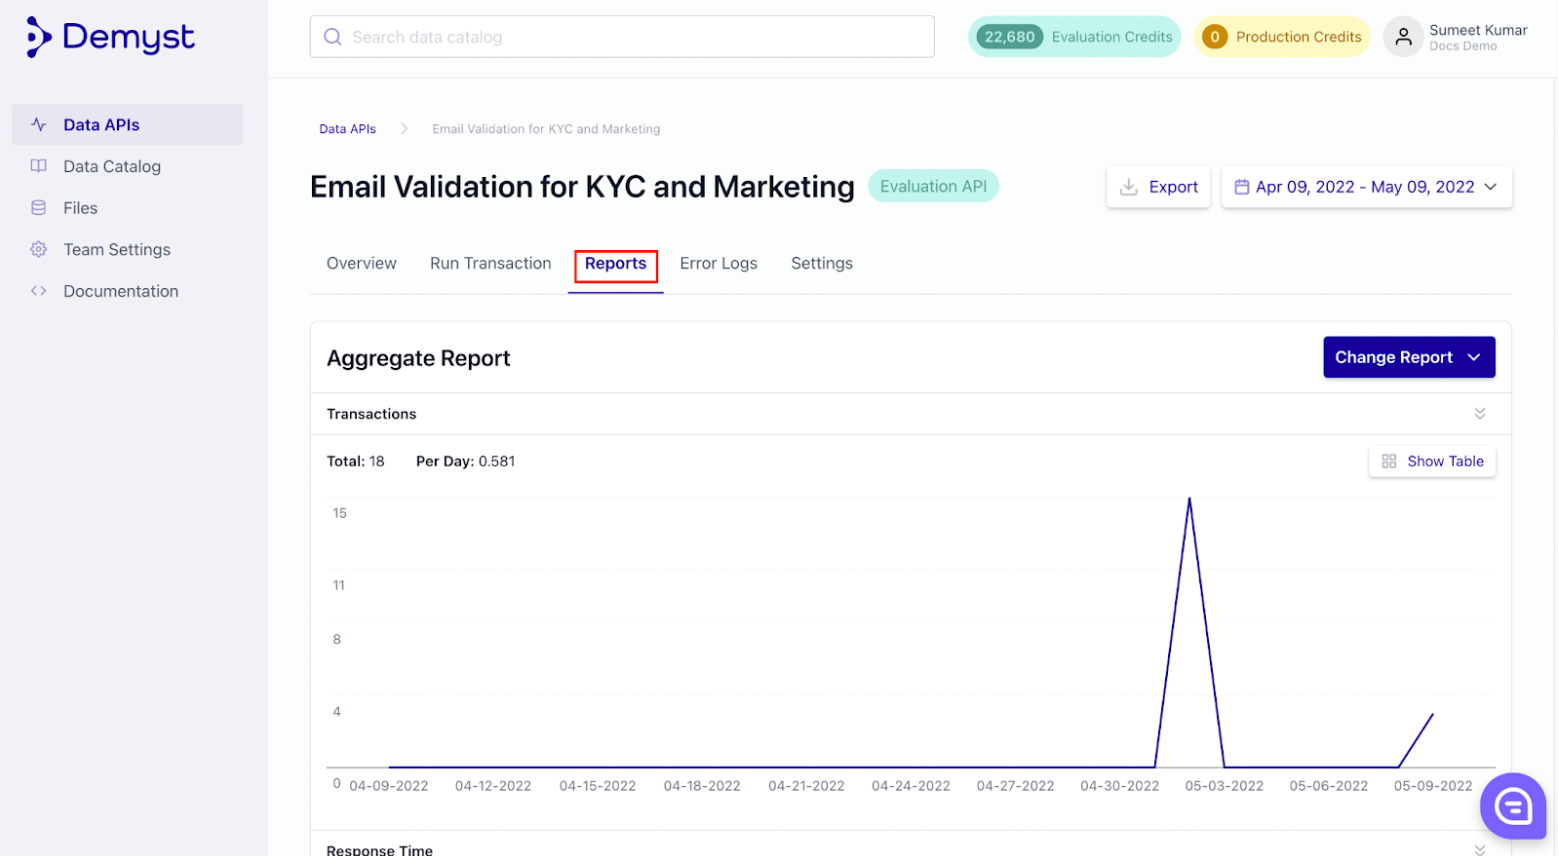
Navigate to the data api that we have been using in the series and click on 'Reports'. In the reports section you can view:
-
Transactions: The transactions per day.
-
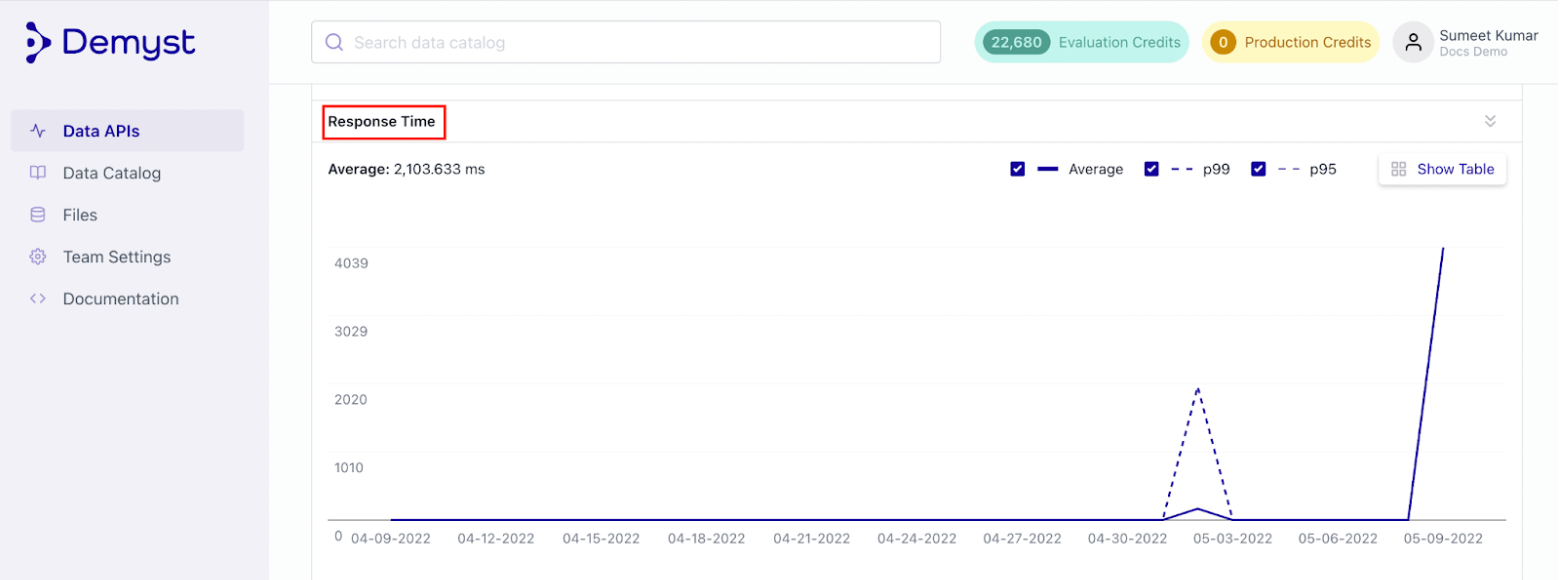
Response Time: The response time for Average , 95th and 99th percentiles.
-
Errors: Any errors encountered during using the Data API per day.

-
-
The reporting data can also be viewed at a connector level by clicking on the "Change Report" button.
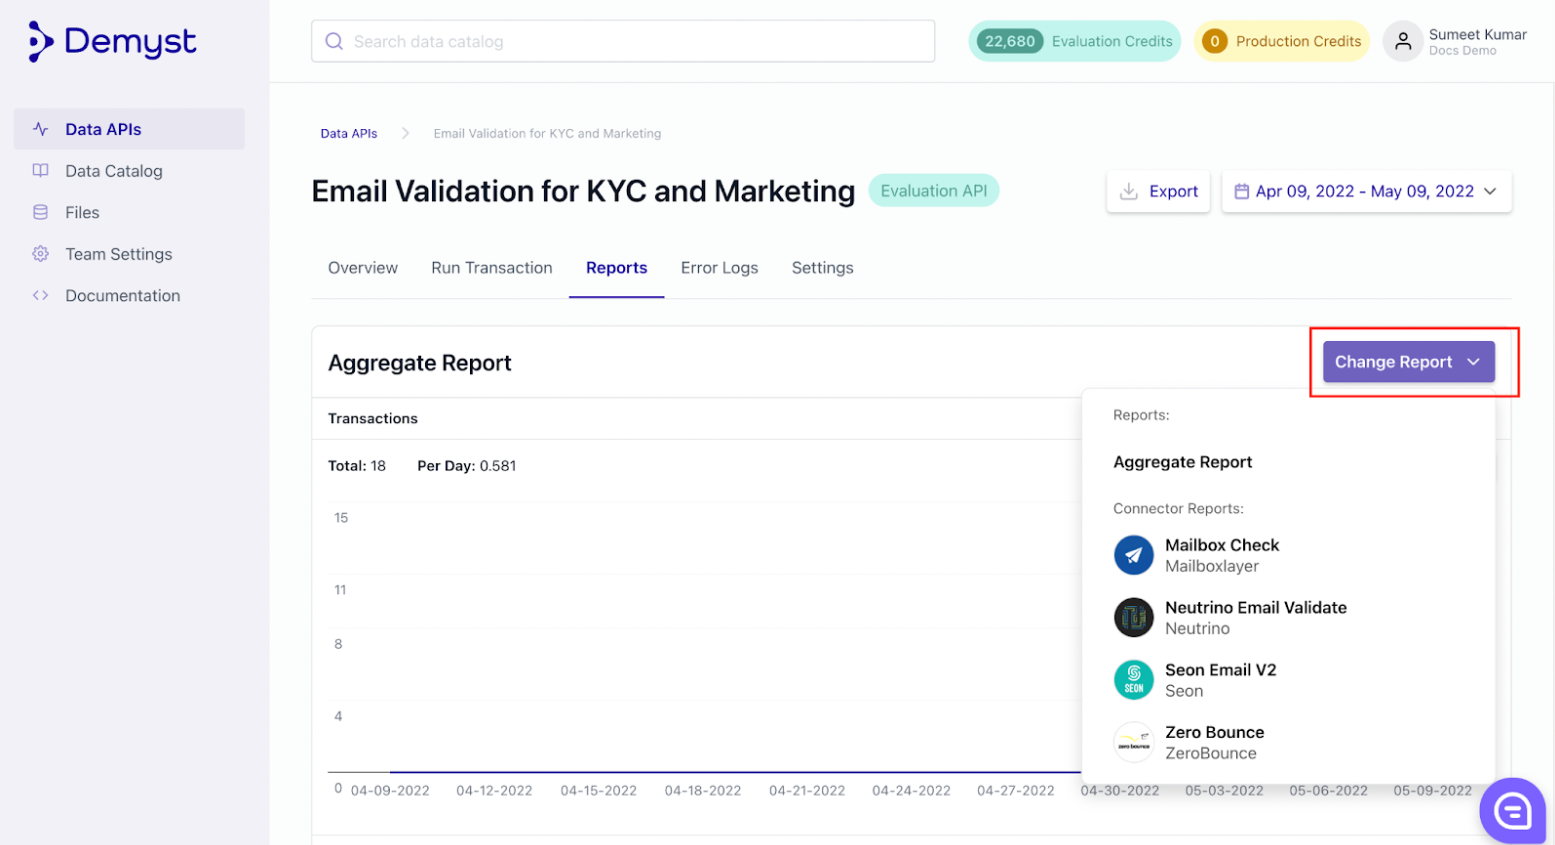
-
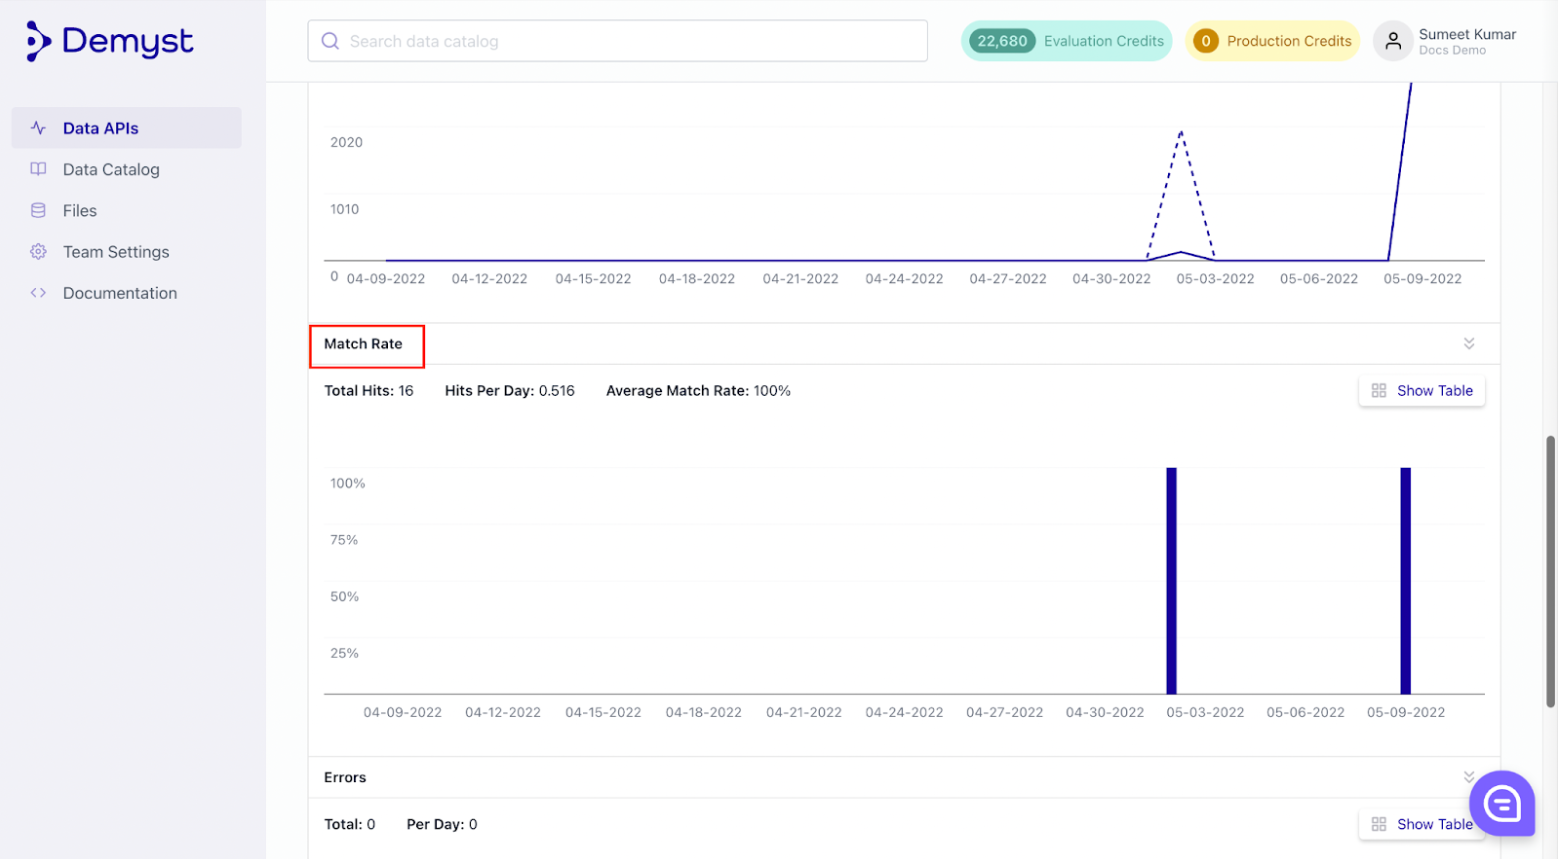
At the connector level, we can also view the "Match Rate" implying how many transactions matched successfully against the given connector to return a response.
-
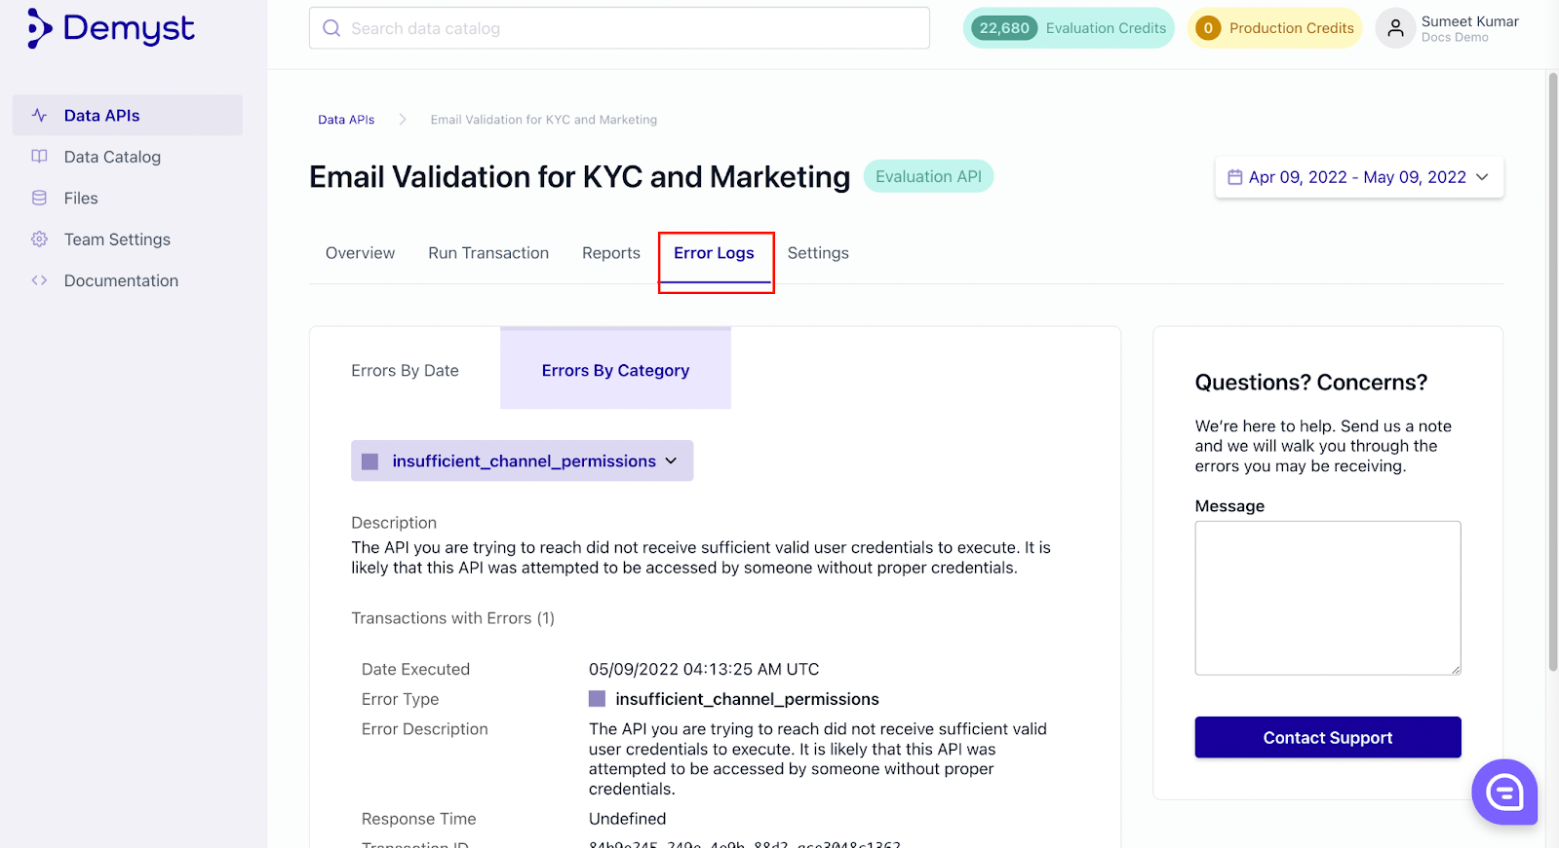
Detailed error logs are also available under the "Error Logs" tab which can be further drilled down into errors by date and category.
This concludes the review of dashboards for monitoring and managing Production Data APIs.
If you have any questions about anything in this getting started guide, please reach out to our friendly customer success by directly accessing the chat bubble in the platform.